Author

About the Author
@awcolman     -     Email     -     Articles

The Puzzle Box: Personalizing Your Cube

Hello, everyone, and welcome back to the Puzzle Box!

Now, that is probably more of a welcome back for me, rather than you, as I’ll have to assume that you have been around these parts more than I have as of late. Last time I showed up here, I was winding up my life in Winnipeg, preparing for a really big adventure across the the ocean in Europe. The trip was fantastic and will actually be the topic of my article today. This will resemble a bit of a travel blog, but it all has its point rooted in building and personalizing your cube.

MORThe Start of the Addiction 

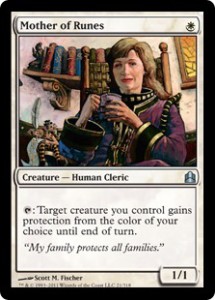
I’m going to rewind for a moment and talk about the night that I bought my [card]Mother of Runes[/card]. I remember talking to the guy behind the counter and saying, “Mother of Runes is a cube card right?”

He laughed and said, “Of course it is!”

I replied, “I’ll take one.”

He asked me which one I wanted, and I responded by asking for the cheapest one possible. He laughed again and said, “You say that now, but later you’ll want the foil one, then the foreign foil one, then the altered foreign foil one and then… and then… and then…”  

“No, not me,” I said.

A few years and a foil [card]Liliana of the Veil[/card], [card]Flickerwisp[/card], [card]Falkenrath Aristocrat[/card], [card]Pack Rat[/card], [card]Lone Missionary[/card], [card]Vendillion Clique[/card], [card]Thirst for Knowledge[/card], [card]Snapcaster Mage[/card], [card]Cryptic Command[/card], and any other cube foil I have laid my eyes upon later, I am now looking for my foil [card]Mother of Runes[/card].

The Trip

I wanted to have a really cool article to write, either while on my trip or as soon as I got back, which was two and half months ago. I had to think of something I could do for my cube throughout the whole trip. My idea was this: in each city that I could buy Magic cards in, I would buy a foil that matched the theme of that city or country, or however I could justify buying a foil for my cube. Perfect! We were gone for 45 days in five different countries. I should have had my cube totally finished by the time we got back. Alas, this is not how it worked out.

irealnd

My wife and I landed in Dublin. As soon as we got off the plane, we dropped our bags off at the hostel and headed to a pub for some dinner. (Here I had my first Guinness, but that is a whole other story. In short, in North America I am embarrassed when a friend orders a Guinness at my table. In Ireland, it is the nectar of the gods! From there, we headed to the Guinness factory, which was amazing, but again, a story for another time.)

It was the next day that my wife and I scouted out the local MTG shop. Forgive me, but I forget the name. It was a small, quaint place and the guy working there was wonderful. I told him I was from Canada and what my cube mission was and we dove into their singles binders straight away.

I asked him what he thought a themed cube card could be and he said, “Anything to do with drinking, vikings, or leprechauns.” We dug through Lorwyn looking for a foil [card]Glen Elendra Archmage[/card] to no avail. After a while, he gave up and left me on my own to scour the binders while we chatted.

Eventually, I came across an [card]Oath of Druids[/card], but it was non-foil. I asked him, “Druids are Irish right?” He went on to tell me all about the druids that had lived in Ireland thousands and thousands of years ago and I was sold! I left with a non-foil Oath of Druids that I cannot imagine ever replacing with even a free, altered, foreign foil, because I got it from the land of the druids with all of the stories attached to it. I now have one of the coolest conversation pieces I own in my cube and I get to use it and talk about when ever someone flips something crazy off of it. I can say, “You know that Grislebrand was summoned from Dublin, eh?” and let Magic do what it does best and create an awesome social atmosphere!

High-Power Personalization

It was after this visit with the guy in Dublin that I Untitled
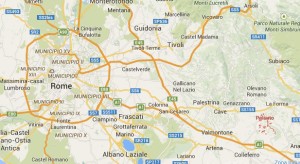
realized that this idea fit right into the Puzzle Box ethos: high-powered play without a high-powered budget. With this concept of personalizing your cube, you can have high-powered personalization without a high-powered budget!

I plan on finding little stickers of the flags for each country where I bought cube cards and putting them on the perfect fit over each card’s set symbol to try and further spark the conversation. If you are talented and buy a card like [card]Cogwork Librarian[/card] in Alexandria, you could paint an Egyptian or Minnesota flag on it and have your own Librarian of Alexandria.

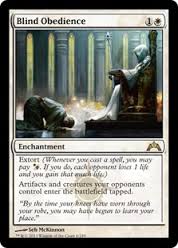
Of course, you don’t need to travel to other countries to buy themed cards that you can attach a story to. If you come to Canada during winter, you can get an [card]Icy Manipulator[/card] from Ice Age and tell people how bloody cold it gets here. Or if you go to Florida, you can get a [card]Mother of Runes[/card] next door to your grandmother’s summer home. If you are in Paliano, which is actually a place just a little to the southeast of Rome, you could perhaps pick up a Paliano and find the mayor or any citizen to sign it for you.

Another Souvenir Another Reflection

One of my favorite parts of this whole exercise was that it really got me thinking about what I was seeing. When we were in Paris and went through the Louvre, we went on a tour through Napoleon’s apartment. It was a spectacle! Everything was dripping in gold and covered in the most plush of upholstery.

One thing that my wife noticed was that most of the many, many paintings were of hunting scenes. Not just scenes of men riding with guns and dogs, but the actual moment when the prey that was being stalked was being killed, either by gunshot or dog bite. It was quite violent. As we walked around and heard bits of the tours describing how the monarchy taxed and taxed and taxed and gave nothing back but misery, it occurred to me that that felt very Orhsovish. It was rich and took on the official appearance of religion and benefit for its people, but their actions resembled more the themes of the paintings: death.

After the Louvre, we had planned on going to find the Magic shop to find the card for my cube. There was a perfect choice: [card]Mortify[/card]. It was black and white, it killed creatures and enchantments.  It’s no [card]Vindicate[/card], but that’s okay. To be fair to France, in a small town called Altkirch, where my wife’s family is from and there are no opportunities to buy cards, I would have bought an [card]Eternal Witness[/card]: it was beautiful!

That’s what I have for this installation of the Puzzle Box. There are lots of other souvenir cards to talk about and really, really cool stories and lessons to attach to them. Next time: London, the Graffiti Tunnel, Lambeth, and Thalia.

Thanks for lettin’ me come and hang!

Andrew

Serum Visions: Lager is Beautiful

Hello, everyone, and welcome to Serum Visions!

This week, we are going to be talking about the most popular beer in the world: the lager. There is a beautiful and interesting history behind this type of beer that is hidden behind its most recognizable brand, Budweiser. While finding its roots in Austria in the mid 1500s, it has become one of two umbrella catagories for more than twenty-five very unique styles. The research and development that went into making it more easily produced actually led to a German knighthood. Hopefully by the end of this article, you’ll see the lager as a real thing of beauty that is much deeper than the fizzy yellow water it is so often associated with.

“The brewer surely has an intention, but the wort itself is agnostic as to its destiny— it is the yeast that decides its future.” Garrett Oliver et. al

This quote so perfectly sets up what is to be said about the lager. The brewer’s intention has been infinitely cleared up for him in the last hundred or so years since yeast strain isolation has been fully understood. The brewer’s intention was still quite clear to them for the previous three hundred or so years, but not to the same degree. In the time leading up to around 1550, the brewer’s intention was being understood and honed.

The “agnosticism” of the wort, or unfermented beer, means that it will be whatever kind of beer that it is coerced by nature to be. During the early stages of understanding and honing, brewers would mash their grains and boil in their hops, knowing that in a few weeks the wort would bubble away and end up as the sweet nectar, beer. The process by which that happened was still largely unknown to them. We now know, of course, that the process is fermentation by way of yeast. In the days of old, pre-1553, it was the atmospheric temperature that would determine the type of beer being either an ale or a lager. If it was during the summer months, it would be an ale, and during the colder winter months, it would be a lager. This is because there are two main strains of beer yeast which are active at differing temperatures. Saccharomyces cereveisiae, which is the ale yeast, ferments between 60 and 75 degrees Fahrenheit and saccharomyces pastorianus, the lager yeast, ferments between 13 and 42 degrees. 

i-TPSP3QS-L

A Brief History

In 1553, the Duke of Bavaria, Duke Albrecht V, decreed that no beer was to be produced between April 23, St. George’s day, and September 29, St. Michael’s Day. These are the summer months. They had figured out that the beer produced during the summer was far more likely to spoil than that made during the cold winter months. This was because sanitization was not fully understood yet, so the bacteria that would invade the brew was usually uncontested and thus ruined the beer. In the winter months, it was too cold for these bacteria to survive, so the beer would remain unspoiled. 

The name of lager comes from the German verb lagern, which means to store. This is because once the beer has been fermented, it needs to be stored, or lagered, for three weeks to three months. During this time, the beer would be stored at or just below freezing, and the off-flavor and aroma compounds would be reabsorbed by the yeast and then settle to the bottom. It’s during this time when the beer achieves its clean, crisp profile. The beers that were made coming up to the production time of late April would need this treatment as well, regardless of how warm it was. To ensure these temperatures were kept, the brewers would pack their fermentation cellars full of ice blocks from frozen lakes and ponds during the winter. This practice was kept until the practice of artificial refrigeration was implemented around 1870.

03The implications of this are quite far-reaching. This means that any beer brewed in Bavaria during these three hundred
years had to be a lager. We could not possibly imagine for a moment that this region only drank what the general population considers a lager for three hundred years. No, they without a doubt would have wanted variety. This means that there would have been everything from light and refreshing beers to heavy and contemplative beers. Pale and dark, high alcohol and low alcohol, hoppy and not—to every variation of beer we are familiar with today made as a lager. There are 27 different styles of lagers listed by Beer Advocate, all of which undoubtedly have their origins in Bavaria during this time.

Innovation & Knighthood

asset_upload_file942_36858_thumbnailIn 1868, Carl von Linde joined Weihenstephan. Weihenstephan is the world’s oldest continuously operating brewery and arguably the worlds foremost brewing university. Establish by Benedictine monks in 1021 as an abbey and brewery, it has become a part of the Technical University of Munich that has been offering doctoral degrees since 1920. Linde was the first person to take seriously the idea of keeping beer at colder temperatures using artificial refrigeration. He based his “ammonia cold machine” off a principle called vapor-compression refrigeration (wiki here), which is still used to air condition cars and homes to this day. Most of the funding for this research came from a brewery in Munich called Spaten Brewery. This brewery was the first to install the system, in 1873. In 1879, Linde went on to start a business called  Ice Machine Company, which sold almost 750 cooling systems in eleven years! This company is still around and employs 48,000 people in more than 100 countries. Linde was knighted in 1897 and died in 1934. He made great strides in the manipulation of gases that included the liquifying of oxygen and nitrogen. However, it is his advances in beer cooling technology that may his be most enduring innovation.

The world and history of lagers is so much larger than it appears at first glance. I’d encourage you to dig in and try as many different kinds as you can. When you find one you love, or if you have one you already love, please hit me up on Twitter at @awcolman or leave a comment below! I’d love to hear what discoveries you have made.

As always, thanks for hangin’.

Andrew

Style of the Week

American Amber / Red Lager, American Double / Imperial Pilsner, American Malt Liquor, American Pale Lager, California Common / Steam Beer, Czech Pilsener, Euro Dark Lager, Euro Pale Lager, Euro Strong Lager, Bock, Doppelbock, Dortmunder, Eisbock, German Pilsener, Kellerbier / Zwickelbier, Maibock / Helles Bock, Märzen / Oktoberfest, Munich Dunkel Lager, Munich Helles Lager, Rauchbier, Schwarzbier, and Vienna Lager

These are all of the lagers listed on Beer Advocate that exclude Bud-Miller-Coors. Go to wherever you get your craft beer and ask for a lager made by a local microbrewery. If for some strange reason your local microbrewery does not make a lager, talk to the person helping you about finding one of the styles listed above. They should be able to help you find one that you will enjoy. 

Puzzle Box – Twos Four-Man Format, Red Section

Hello, everyone, and welcome back to the Puzzle Box!

This week we are going to be looking at the red section substitutions as we continue building our cube to optimize it for the four-man format called Twos. If you have been following along, there is a good chance that you will have a pretty good idea of the swaps we are going to be making and the reasons for them. I am going to go through them card by card to give you a a solid foundation on how you can evaluate cards that are going to be released in the future, or just so you can go digging in the trove of cards we already have and find a hidden gem. Twos is a little-discussed format across the internet, so there are sure to be a pile of great cards for the format still out there.

If you are joining us part way through this series, you can go and find the introduction to this format here. It’s fast, really complex, and a lot of fun.

Let’s Get to the Cards!

Image[card]Torch Fiend[/card] —> [card]Forge Devil[/card]: Swapping out Torch Fiend for Forge Devil is easy here. It will be a theme in the red section to find lots of cards being swapped for ones that deal an efficient one damage to a creature. Because this is such a fast-moving format, cheaper creatures will be more valuable than more expensive ones. You’ll often find that those cheaper creatures have one toughness. So Forge Devil will always come down and kill a guy and proceed to be a good blocker because of his one power!

[card]Stormblood Berserker[/card] —> [card]Cunning Sparkmage[/card]: Stormblood Berserker is a really good card—it even stands up to the [card]Gut Shot[/card] test most of the time. But Cunning Sparkmage can blank an aggro player’s whole hand. 

[card]Keldon Vandals[/card] —> [card]Taurean Mauler[/card]: Taurean Mauler will not be a 2/2 for three for very long. It gets the benefit of having two opponents to pump it up. It is very possible that it will be attacking for four or five on turn four. Regarding the cuts of all of the artifact-destroying creatures: I am working within the gameplay of the Puzzle Box. There are no backbreaking swords or fast mana artifacts. If you have decided to add those to your own cube, you are going to want to find a way to fit these creatures in, as they are important for the balance of the format. This may mean that you’ll need to move up from a 270-card cube.

[card]Blistering Firecat[/card] —> [card]Purphoros, God of the Forge[/card]: Blistering Firecat is alright, although it is in the Puzzle Box list as filler as we were shaving pennies to get under the $200 mark. With the Twos list, we are letting loose a bit. Purphoros is nuts and super fun! He deals two damage to each opponent whenever you play a creature. That turns every creature following the god into four damage. How about curving from this guy into [card]Spectral Procession[/card], [card]Lingering Souls[/card], or a few copies of [card]Empty the Warrens[/card]?

[card]Gore-House Chainwalker[/card] —> [card]Hellspark Elemental[/card]: Hellspark will almost always deal six damage. You’ll often have an opponent with no blocker and they will be discouraged from using a removal spell on something that is going to die right away anyway.

Image-1[card]Burst Lightning[/card] —> [card]Gut Shot[/card]: Being able to kill the glut of X/1’s for free is way better than a shock with an upside that you will almost never use. Easy swap!

[card]Searing Spear[/card] —> [card]Lava Dart[/card]: Again, being able to do one damage twice, and more flexibly, is more important than being able to deal three damage all in one shot.

[card]Arc Lightning[/card] —> [card]Arc Trail[/card]: We have all seen Arc Lightning get a three-for-one in cube, and it is so good when it happens. So why am I swapping out an effect that we have been bending over backwards to get? Arc Trail is one mana cheaper and will often be a two-for-one. In Twos, you will just be happier getting a two-for-one a turn sooner.

[card]Fireblast[/card] —> [card]Flame Rift[/card]: Fireblast does four damage to an opponent while Flame Rift deals four to each player!  Yes, this does mean that your team is taking eight as well, but if you have the red deck, you should be ahead on life so it won’t be a problem. The ability to sacrifice two mountains is less appealing in a faster format because you may not have the time to get out those extra lands. Also, you will certainly be playing sixteen land in this deck, so those extra lands might not be so extra.

[card]Char[/card] —> [card]Guttersnipe[/card]: In Twos, Guttersnipe is absolutely pack one, pick one material! This card, like so many others, specifies that it deals two damage to each player. So… counter that spell and four you, bolt that creatures and four you, loot faithlessly and four you, [card]Brainstorm[/card] and four you. Just tack on “and four you” to every card in your Izzet deck and smile. This card wins games!

[card]Wildfire[/card] —> [card]Slagstorm[/card]: Think of Slagstorm as a mini Wildfire minus the sac lands effect. Hmm, that’s not really a Wildfire. How about a red [card]Wrath of God[/card] that has the ability to deal six to each team for three mana? Maybe it’s just Slagstorm. This card can go in the red control deck and in the burn deck. Again, because all of our creatures are so cheap, the toughness is going to be low, so it will be rare that a creature survives through a Slagstorm!

Image-2[card]Sulfuric Vortex[/card] —> [card]Empty the Warrens[/card]: Sulfuric Vortex is worthy of pack one, pick one in regular Cube. We are going to swap it out for a card that highlights one of the fun parts of Twos. The teamwork aspect really shines with this card. Imagine that you draw this on your third turn and ask your opponents if they have anything they can do on your next turn. They respond with, “Oh, you have Empty?” and you reply with, “Yeah.” Then you both talk about how you are going to sequence your next turn or whether you should wait a turn because you think you can live for one more. All the while, your opponents are looking at each other trying to figure out it they can do anything. When you pass the turn, they get to have a discussion on what it is they are going to to do try and stop their impending doom.

Green with Anticipation

If you haven’t tried this format, take whatever cube you have, in whatever configuration, and give it a try! If you enjoy the experience, you should think about adding these Twos-specific cards as a subset of cards for your cube. This is what I am doing right now. The play experience is so much different when you have an optimized list for the format. I will post a Puzzle Box Twos list on Cube Tutor when this project is complete. Until that time, let me know if you’ve given it a try on Twitter. You can find me at @awcolman. Hope to hear from you soon!

Thanks for hangin’, everyone.

Andrew

Serum Visions: Bottling Day!

Hello, everyone, and welcome back to Serum Visions!

First things first, I must apologize for my absence these last two weeks. My wife and I are moving to Toronto and just did the big packing blitz. It left absolutely no room for writing. But here we are, back and ready to bottle! 

This week we’re going to be following up on Brew Day in 15 Steps. If you by chance actually brewed your first beer on that day, it’s time to bottle. I know this because I started a brew not long after that article was published, and it’s time to bottle that one. 

There are a few things that you need to do before you bottle your beer to ensure that you aren’t creating little exploding brew bombs. You are going to need to check your final gravity (FG) at least twice with your hydrometer, to make sure it has finished fermenting. If you remember from the brew day, we check the Starting Gravity (SG) to find out how much sugar is in the wort. This lets us know approximately what the final alcohol percentage will be. We check the gravity again, once the air lock has mostly stopped bubbling (probably seven to fourteen days after the brew), to find out how much sugar is left. Then we check again a few days later to make sure that the amount of sugar has not gone any lower: say from 1.013 down to 1.011. If you find this has happened, this means that the beer has not finished fermenting. Once you have checked your gravity twice a couple of days apart and it has not changed, you are ready to bottle.

BottleBombsTo understand why this is so important—because it is very important—I’ll need to explain what happens during the actual fermentation. Yeast is a living organism that feeds on sugar. Like all living organisms, it produces waste from what it eats. In the case of yeast, that waste is alcohol and carbon dioxide. Yeast will continue to consume the sugar until all of the digestible stuff is gone. So, if you bottle your beer before all of the initial sugar has been digested, and then, add more during the bottling process, there will be too much carbon dioxide inside of the bottle and it will explode. 

Steps to Bottling 

Step One: Clean and sanitize everything that will come in contact with your beer! Everything that touches, or even could touch, the beer at this point must be sanitized—no exceptions!

Step Two: Place your fermentor of beer on a raised surface, like a table or countertop. Then place your six-gallon bottling bucket right underneath a carboy on the floor (this is best done in the kitchen where you can get things wet with out being worried about it).

Step Three: Place your sanitized racking cane (which will be connected to about four to five feet clear vinyl tubing) into the brew. Try to keep the bottom of the cane about three to four inches away from the surface of the beer.

3282903853_cfa8b1603a_mStep Four: Syphon the beer from the fermentor into your bottling bucket. Try to leave as much of the sediment, or trub, on the bottom of the fermentor as possible. You will have to tilt your fermentor to keep your racking cane as far away from the trub for as long as possible. Don’t worry to much about getting every drop of beer.

A couple notes on this step:

    a. Many people (including myself) start the syphon with their mouths. If you are going to do this, you must sanitize you mouth and lips. I personally use some bad tequila as a mouth wash just before starting the syphon. 

     b. You must syphon “quietly.” This means you minimize the amount of splashing that happens during the transfer. If you mix in too much air/oxygen into your beer at this point, it will taste like green apples and you will be more inclined to dump your beer rather than drink it.

Step Five: Add priming sugar to your beer (the sugar that will make your beer carbonate). There are a couple different options for this step:

     Option 5A: Carbonation Drops – These are drops of sugar that are pre-made to be the correct amount of sugar to carbonate a single bottle of beer. To use these, you simply put one drop into each bottle and then fill each bottle. This is by far the easiest and safest way of carbonating beer for a beginner.

     Option 5B: Malt Extract or Dextrose Priming Sugar

Step 5B.1: Measure out 3/4 cup dextrose priming sugar or 1-1/4 cup of dry malt extract.

Step 5B.2: Boil chosen priming sugar with a cup or so of water for five minutes to sterilize.

Step 5B.3: Add to beer in bottling bucket and stir gently for ten to fifteen seconds. Do not mix in any air!

Step Six: Wash and sanitize all bottles! This means getting all debris and dirt out of the bottles and thoroughly coating the inside of the bottle with no-rinse sanitizer. Try to get as much of the sanitizer out as you can, but do not rinse.

Step Seven: Syphon beer into the bottles quietly: do not mix in air! Fill the bottles until the beer reaches the very top of the bottle—when you remove the bottling wand you’ll be left with the perfect amount of empty space.

For this step, you’ll be attaching your bottling wand to the other end of your tube that is connected to you racking cane. The bottling wand makes it so you have a controlled flow of beer into your bottles.

Again, if you are starting the syphon with your mouth (a great opportunity to have a couple of mouthfuls!), you need to sanitize your mouth and lips. 

KONICA MINOLTA DIGITAL CAMERAsuper-agata-bench-capper
Step Eight:
Cap bottles using sanitized caps. There are many types of cappers for glass bottles. If you get a floor capper, where you use a lever to push the caps on to the bottle, you can use any pop top beer bottle. If you are going to use a butterfly capper, you need to use bottles with short ridges underneath the top lip of the bottle. The easiest bottles like this to find are MGD, Heineken, Stella, and Corona. 

Please do not go out and buy a fresh case of these. You can go to vendors or local watering holes and ask to buy cases of empties. Not everyone will do this, but there’s a good chance that someone in your area will help you out.

Do not use twist-off style bottles! These may or may not seal. If they don’t, it will result in flat and oxidized beer!

Step Nine: Put your beer in a warm place to let it carbonate for two weeks. I do encourage you to try your beer after it has been in the bottle for only a week. It probably will not be very good, but you will start to learn what beer tastes like during different stages of its life. 

Step Ten: Your beer will be drinkable after two weeks in the bottle, pretty good after three to four weeks, and at its peak (most likely) from five to seven, depending on what kind you have made. One thing is always for certain: the longer you wait, the better it will be. And the last bottle is always the best!

[deck title= Bottling Apparatus List]
1 Bottling Bucket
1 Racking Cane
1 Bottling Wand
1 No Rinse Sanitizer
1 Priming Sugar or Carbonation Drops
1 Beer Bottle Capper
6 feet of vinyl tubing
56 Caps
56 Pop Top Bottles
[/deck]

This is the bare minimum set up one needs for bottling. If you would like to cut the bottle cleaning time by 75 percent, I recommend a bottle washer that you screw on to your tap in your kitchen, as well as a wonderful contraption called a Vinator bottle washer. If you are planning on getting into this hobby with any vigor, these two pieces are a must!

Now Drink

So there you have it! In Twenty-five steps and a little waiting is all it takes to have 56 beers that you crafted yourself! I love this hobby, and if you get into it, I know you’ll love it too!

If you noticed that I have missed anything, please let me know. If you have any questions or need any help, you can hit me up on Twitter at @awcolman.

Thanks for hangin’, everyone.

Andrew

Puzzle Box – Twos Four-Man Format, Black Section

Hello, everyone, and welcome back to The Puzzle Box!

This week, we are going to be continuing our in-depth look at the Twos four-man format. We’ll be replacing some  of the black cards in the current Puzzle Box list with cards that are better suited to the aggressive nature of this variant.

Image-4If you have never heard of this format, you’re in the majority! It is a little-known style of cubing that seems to have originated in Toronto, Canada, and made its way to Winnipeg via Rich, one of the owners of Fusion Games. It was the de facto Cube format in Winnipeg for five or six years before people got hip to classic six-person team drafts and full eight-person Swiss. This basically meant that the format was explored in a way that was free from the influence of the cards that are good in 1v1 like [card]Wall of Omens[/card] and the like. It got to develop as its own thing for a long time. You can read about why this format is so awesome in my primer post here

The Swaps

There are lots of swaps to be made in black, and even a windmill slam auto-include from the newest set, Conspiracy, that is super exciting!! Let’s gitt’r done!

[card]Tormented Hero[/card] -> [card]Carrion Feeder[/card] – Carrion Feeder is a creature that should be in the main Puzzle Box list to begin with, but as of right now, it is not. We are swapping out a two-power one-drop for a one-power one-drop here because [card]Carrion Feeder[/card] has a much better upside. It makes your opponents blocks and removal spells worse because it can just eat up whatever is dying and become a huge threat. Not super Twos-specific, but a good swap none the less.

Image-2[card]Nezumi Graverobber[/card] -> [card]Fume Spitter[/card] – [card]Fume Spitter[/card] is an incredible threat in this format. As you may be noticing, the cost, and therefore size, of the creatures in a Twos cube is greatly reduced, so the number of x/1’s is going way up. Nezumi Graverobber is just too slow. Though it can sometimes attack for four on turn two, that is basically Magical Christmas Land. It’s most often a 2/1 for two that doesn’t do much else.

[card]Hypnotic Specter[/card] -> [card]Thrull Parasite[/card] – A one-drop anything with extort is good in Twos, as it turns every spell you play thereafter into a four-point life swing! [card]Hypnotic Specter[/card] is just too slow, attacking for two on turn four is not worth the random card an opponent will have to discard (if she even has any left).

[card]Bloodgift Demon[/card] -> [card]Pulse Tracker[/card] – [card]Pulse Tracker[/card] has been referred to as the black [card]Wild Nacatl[/card] in Twos. Every time it swings, it dings each opponent for one, and since you have two opponents, it hits them for two without even connecting! Like with our other cuts, [card]Bloodgift Demon[/card] is too expensive.

[card]Oona’s Prowler[/card] -> [card]Wight of Precinct Six[/card] – [card]Oona’s Prowler[/card] is a great card, but it just doesn’t have the upside that Wight has. Wight is a good turn-two play because there is a good chance that it will be at least a 2/2 with two opponents feeding it. And if the game goes long, you could very well have a 10/10 for two mana… Tarmo-who?

Image-3[card]Vampire Hexmage[/card] -> [card]Dregscape Zombie[/card] – [card]Dregscape Zombie[/card] is a two-mana 2/1 that can act as pseudo-burn later in the game. Seeing that blocking is not a big part of Twos strategy (because normally at least one of your opponents will not have a blocker), you can kind of see this card as a 2/1 for two mana that has a flashback [card]Shock[/card] stapled to it. It’ll be there to get those last points of damage in when you are top-decking.

[card]Geralf’s Messanger[/card]  -> [card]Soulcage Fiend[/card] – This one is pretty straightforward: [card]Geralf’s Messenger[/card] hits your opponents’ life for four, and the fiend hits them for six.

[card]Sign in Blood[/card] -> [card]Blistergrub[/card] – Drawing two at sorcery speed is just asking for trouble here. [card]Blistergrub[/card] will often be unblockable with two opponents, and will dome them for four when it dies. Sounds like a two-for-one that attacks instead of kills you.

[card]Doomblade[/card] ->[card]Fleshbag Marauder [/card] –  A well-timed [card]Fleshbag Marauder[/card] will often be a two-for-one. It takes a lot more work in Cube to get a two-for-one out of a [card]Doom Blade[/card]. And the [card]Doom Blade[/card] will never attack.

[card]Snuff Out[/card] -> [card]Dark Blast[/card] – Similar to [card]Fume Spitter[/card], Dark Blast will kill a large number of threats in Twos and is recurable. [card]Snuff Out[/card] comes at a real cost and will most often be a one-for-one.

[card]Animate Dead[/card] -> [card]Unearth[/card] – With fatties far more scarce here, [card]Unearth[/card] ends up having more utility more often.

[card]Vampire Nighthawk[/card] -> [card]Tyrant’s Choice[/card] – This card will always be eight life for two mana! Nighthawk is awesome, so if you want to find something else to cut for [card]Tyrant’s Choice[/card], go for it, but it is an auto-include!

Image[card]Black Sun’s Zenith[/card] -> [card]Exsanguinate[/card] – [card]Exsanguinate[/card] is a bomb. It goes in every black deck. It will finish games out of nowhere!

[card]Profane Command[/card] -> [card]Massacre[/card] –  [card]Massacre[/card] will often be free with two opponents, and [card]Profane Command[/card] is, again, too expensive.

[card]Curse of Shallow Graves[/card] -> [card]Zombie Infestation[/card] – [card]Zombie Infestation[/card] is a more reliable token generator that helps out the reanimator package, so it’s an easy swap.

The Takeaway

It’s clear that black is truly rich in resources when it comes to really great Twos cards. Seeing that there are around thirteen-thousand unique cards in Magic, it is possible that some gems have yet to be mined. If you are interested in this format, take some time to scour Gatherer and see what you can come up with. If you find anything that you think would be good, you can hit me up on Twitter at @awcolman any time!

Thanks for hangin’, everyone. Play this format; it is super sweet!

Andrew

Serum Visions: Brew Day in 15 Steps

Hello and welcome back to Serum Visions, everyone!

This week I am going over a much requested topic: the brew day. In this article I will be dealing with all of the gear and steps you’ll need to do you first steep brew. Think of it as a lesson in home-brew. At the end, there will be a final shopping list that you can take to you local home brew shop (LHBS) to get you started in one of the best hobbies one can enjoy!

These last couple weeks have been exciting in my beer world. During my career of making beer, I have had countless people ask me how to beer is actually made. It takes me about ten minutes to explain the whole process and about a third of the time the person I explained it to is intrigued enough to want to learn. It seems that now that my days in Winnipeg are numbered, it is crunch time for getting in all of these brewing lessons. Last week I did one on Monday and another on Tuesday and I have at least another two lined up in the next month; what fun!

Lesson Number Onerelax-don-t-worry-have-a-homebrew

Before we get into the step-by-step bit of the article, there is one thing that the new home-brewer must know and two lessons to be learned right from the beginning.

First thing: There is never such a thing as a perfect brew. Mistakes happen, and as long as you stay clean everything will be fine.

There are two sayings you need to remind yourself of as you absolve yourself from making a mistake in the brewing process.

1. RDWHAHB: “Relax, Don’t Worry, Have a Home Brew.” This is the famous line from Charlie Papazian, the author of the definitive home brewing book, The Complete Joy of Home Brewing. It is advised that when you are making beer you should be drinking a home-brew at the same time. If it is your first batch or you have poorly timeed your batches so you don’t have any HB left for your brew day, any good craft beer will do.

2. “It’ll be beer“:  I think this one came to me from the Home Brew Talk forums. This is one that I personally love. As you go though the process, you’ll miss temperatures and timings and forget things. As long as you are keeping everything clean with your non-rinse sanitizer, everything will be fine and you will end up with beer! So just say, “It’ll be beer…!”

The Process

Step One:
Pick a recipe at Brew Toad, and purchase your ingredients at your LHBS. The ingredients for a steep beer will include:

Malt extract
Specialty grains
Hops
Yeast

Simple enough.

Step Two:
Once the ingredients arrive in your kitchen, get out your brewing pot and fill it close to the top with cold water. The smallest pot you’ll want to use for this process is about 12 to 14 liters. Anything smaller and you are going to have trouble having enough room for all of your ingredients and a reasonable amount of water.

Step Three:
Place your specialty grains in a grain bag and that bag into the cold water. You’ll get this bag at you LHBS when you are getting your ingredients for the first time. I recommend a nylon one as it is easier to clean and won’t fall apart after a few uses.

Step Four:
Turn your stovetop to high and bring the water up to 170 degrees Fahrenheit; use a thermometer. As the temperature of the water rises, it will extract the unique flavoring characteristics from the specialty grain. Note: these grains will not add to the alcohol content of the beer using this procedure. They will only add flavor, color, aroma, and mouthfeel. If you let the water go too much above 170, it will start to extract undesired things from the grain such as tannins.

Step Five:
Remove grains from the water at 170 degrees and let the remainder of the wort drip from the bag. I do not squeeze the bag because this also extracts tannins from the grains. I believe some people do squeeze the bag and are happy with their beer. I’m not sure if this topic has been empirically explored yet, so I can only recommend not to on folk practices.

Step Six:
Bring pot up to a strong rolling boil.

Step Seven:
Start a timer for 60 minutes and start adding your hops according to your hop schedule. This will be included in the recipe for your beer. Note: when you see a hop addition with a number of minutes beside it, this indicates the remaining time left in the boil. For example, the hops added at the 60-minute mark will be boiled for 60 minutes. The hops added at the 10-minute mark will be boiled for 10 minutes before the element is turned off and cooling begins. Flame out hops are added to the “boil” when the element is turned off and cooling starts.

Step Eight:
With 15 minutes left, add the malt extract and stir until it is completely dissolved into the wort; this is to sterilize the extract. Take the pot off of the element and add your malt extract. It is very important to take the pot off of the heat so the extract does not scorch when it settles on the bottom of the pot. At this point, your 60-minute timer for your hop schedule is paused and you must wait for the wort to come to a boil again before resuming your hop schedule.

*Note: sanitary practices are extremely important for the remaining steps.

For this you’ll need a no-rinse sanitizer such as Iodophor or Starsan. I recommend Starsan, but I won’t use the space to go into all the reasons why.

Make a proper dilution of this sanitizer and put some in a spray bottle. Spray everything that comes in contact with your wort. This includes you hands after you have touched anything that is not sanitized.

Step Nine:
Turn off the heat source and start cooling the wort. If you are just starting out, chances are good that you won’t have a wort chiller. If you know you are going to be getting into the game of making beer for real, then I would recommend one strongly. It cuts cooling time drastically. If you do not have one, an ice bath in a kitchen sink with cold circulating water is the next best way of cooling down you wort. You can fill some 571ml pop bottles and add them to the sink of water to bring the temperature down lower than the tap. You will be adding water to your fermenter to bring it up to the 19-liter mark so that will cool it down as well. Here is a calculator to help you hit your final temperature target (around 72 degrees Fahrenheit ) by balancing out water temperatures and volumes.

Step 10:
Add your cooled wort, using a large funnel, to you carboy and top it off with water until you have reached a volume of 19 liters.

You may want to strain your hops out at this point through a metal strainer that has been sanitized. This may not be necessary if you haven’t used a lot of hops in your beer.

Step 11:
Airarate your wort by shaking the hell out of it inside the carboy for three to five minutes. Sanitize your rubber stopper and put in in the top of the carboy, then sanitize your hand and cover the small hole on the stopper and shake shake shake, shake shake shake, shake yo booty, shake yo booty. The oxygen that you mix in is necessary for the health of the yeast and fermentation.

Step 12:
Take a sample of your wort using your thief and take a gravity reading using your hydrometer. These are two indispensable tools for a home brewer. The thief allows you to take samples of your beer with out having to tilt the carboy over and disturb the fermentation. The hydrometer is the tool that tells you how much sugar is in your wort—which eventually converts to alcohol. Make sure to write down the gravity reading from the hydrometer in your brew log. I keep my brewlog in Evernote.

Step 13:
Add your yeast to your wort when it is between 68 and 78 degrees. A lower temperature is fine, but it will take longer for the yeast to start fermenting. A higher temperature should be avoided as it will create off characters in your beer. When you are starting out, I recommend using a dry yeast rather than a liquid one. The reason for this is tat there will most certainly be enough of a yeast cell count to ensure a properly fermented beer. Liquid yeast take a bit of finessing that is not necessary in the beginning stages. Do not shake the fermenter. Let the yeast spread across the top and fall on its own.

Step 14:
Put airlock in stopper and fill airlock with sanitzer solution and plug the top of your carboy. Be sure to move the carboy to a dark place in your home that has a fairly consistent temperature between 65 and 75 degrees. This is assuming you are brewing an ale. Let’s not worry about lager for now.

Step 15:
Wait. The fermentation of your beer will take around 7 to 10 days and will need an extra week in the carboy after that to clear. Most of the time there is no rush to bottle. I have left beers in a glass carboy for months with only positive effects. If you are using a plastic fermentation vessel of some kind, you are on more of clock, as the plastic will actually allow the beer to oxygenate, which is bad.

Step Infinity

This is not an exhaustive primer on how to make a steep beer, but it’s pretty good. There are some minor details that I have not had room for, so I do recommend that if you want to make beer, try to find someone to walk you through it your first time. If you don’t have that luxury, by following these steps and the steps to follow in the bottling portion, you should be able to get the hang of it. If you can get together with a friend, even if he or she knows nothing either, it will make for a much more relaxed and enjoyable experience.

If I have left something out or you want to include me on your first brew day, you can catch me on Twitter at @awcolman. Can’t wait to hear from you!

Thanks for hangin’, everyone.

Andrew

[deck title= Homebrew Starter Shopping List]
[Ingredients]
1 Malt Extract
1 Specialty Grains
1 Hops
1 Yeast
[/Ingredients]
[Big Stuff]
1 Twelve Litre Pot
1 Carboy
1 No-Rinse Santizer
1 Thief
1 Hydrometer
1 Thermometer
1 Spray Bottle
1 Funnel
[/Big Stuff]
[Little Stuff]
1 Grain Bag
1 Rubber Stopper
1 Airlock
[/Little Stuff]
[Sideboard]
6 Homebrew to drink
[/Sideboard]
[/deck]

Serum Visions: Twos Four-Man Format, Blue Section

Hello, everyone, and welcome back to the Puzzle Box!

Image-2This week we are going to be continuing our exploration of the four-man cube format called Twos. If you are just tuning into this little mini-series, you can go back and find what this format is about and if it is right for you play group here

The section we are going to be looking at this week is blue, and it come with a little bit of a caveat: This list is untested when it comes to playing Twos. It is also considerably different from the tuned list that is Pidgeot’s on Cube Tutor. Aside from his list being powered, there is one very significant difference: his colors are not evenly balanced. This is not to say that is bad, it is just different. There are some distinct advantages to having an unbalanced cube, especially in this format. One of my first times playing Twos, while building my deck, I was given a piece of advice. 

“If you’re not drafting blue, you better hope you team mate is. And if you’re both drafting blue, you need to make sure you have a way to win.”

Image-3That is to say, you generally want at least one blue player on your team or you’re going to have some trouble. The problem then becomes: what if there aren’t enough blue cards in the draft pool to support two control decks? This is where the beauty of having an unbalanced cube comes in. If you just have more blue cards than the rest of the cards, then you’ll be able to support multiple blue decks. This concept, however, comes with built-in criticism. Namely, why do there have to be two blue control decks? But keep in mind that you can build the format however you want. If you want it to be a more white-control-focused format, you can double up on white cards and make that your main support color. Or you can have evenly distributed colors and let the cards come as they will. All of this is pretty pedantic and just goes to show you that your cube is yours and you can build it exactly how you and your play group likes it!

On to the Swaps

[card]Arcane Denial[/card] —> [card]Erayo, Soratami Ascendant[/card] – Arcane Denial is garbage. I think I am going to swap it out in the regular list for [card]Deprive[/card]. That being said, with four players playing cheap spells, two of whom want Erayo to flip, the Soratami is super easy to turn over and it counters each opponent. This is back breaking!

[card]Looter il-Kor[/card] —>[card]Spellstutter Sprite[/card] – Looting is great and this one carries equipment like a champ. I could be convinced to keep LIK as a reanimator support card but I think the two-drop slot can be better served. As for [card]Spellstutter Sprite[/card], she also carries equipment like a champ and is also a very real counter spell in this format. Because it’s so fast, one-mana spells are abundant, and you will counter something in a game with the sprite.

[card]Serendib Efreet[/card] —> [card]Mental Misstep[/card]  – The Efreet is a long game control card and these will not be long games. [card]Mental Misstep[/card] has the same virtue as [card]Spellstutter Sprite[/card] as being almost guaranteed to get something. This will be a theme in this article: cheap counters for cheap spells.

[card]Aetherling[/card] —> [card]Neurok Commando[/card] – Aetherling is a virtual seven-drop blue control finisher. In this format, the point of a blue deck is to support its teammate’s aggro deck and beat the other team down. Note that this does not include a plan to slam a giant fatty after garnering a game’s worth of incremental advantages. [card]Neurok Commando[/card] has shroud and draws cards when it connects. Again, as blocking is not a big part of this format, he’s going to draw you a pile of cards while putting your opponents on a clock.

[card]Enclave Cryptologist [/card]—>[card]Delver of Secrets[/card] – Spending three mana to get a looter that almost never attacks and barely blocks is just no good here. [card]Delver of Secrets[/card] doesn’t need much introduction. He’ll eventually flip and then he’ll eat a removal spell or win you the game.

[card]Frost Titan[/card] —> [card]Inkwell Leviathan[/card] – Combo decks such as the [card]Tinker[/card] decks and reanimator decks don’t have as much time to get online, so this is pulling out the other blue finisher and replacing it with a more combo-friendly card. This could be a worth-while swap of the Puzzle Box list to keep in mind for the next time we look at it.

Image-1[card]Mulldrifter[/card] —> [card]Snap[/card] – Five mana for a 2/2 flyer that draws two cards is too slow, and three mana to draw two at sorcery speed is also too slow and it only affects you. [card]Snap[/card] highlights one of the very fun features of this format and how being on teams but taking separate turns creates extremely interesting board states. [card]Snap[/card] allows the person casting it to untap any two lands: including your teammates. So on your TM’s third turn, he can play a land, tap all three, you snap an opponent’s creature back to her hand and untap your TM’s land, giving him a total of five mana to work with while setting you opponent back a turn. How sweet is that?! [card]Frantic Search[/card] is an honourable mention that you can consider, but we wont be including in this iteration of the cube.

[card]Shelldock Isle[/card] —> [card]Spellsnare[/card] – Shelldock Isle is awesome when there is a real glut of huge creature to pick up and hide underneath it. Unfortunately for this situation, we have been cutting all of these creatures, so this amazing land gets way worse for us here. Spellsnare is going along with the more cheap counters for the increased number of cheaper cards. You’ll get something.

Image[card]Deep Analysis[/card] —> [card]Submerge[/card] – Drawing four cards for five mana and three life is great in long games, but not here. This is a card that looks very strange to be in a cube list, but considering that you always have the island and you have two other opponents who will probably have the forest, this spell is almost always free. Again cheap (or better yet, free), is the name of the game!

[card]Meloku the Clouded Mirror[/card] —> [card]Venser Shaper Savant[/card] – Here we have a scared cow being slaughtered. Meloku is an easily splashable, pack-one, pick-one in many, many cubes… but she’s five mana: cut. Venser is not in the regular list because he is expensive, but we are looking for as many counter spells to fit in here as possible to help blue in its ever supporting role.

[card]Control Magic[/card] —> [card]Brain Freeze[/card] – [card]Control Magic[/card] is a lot like Shelldock Isle, in that it’s awesome when there are tons of fatties running around. With four people playing lots of cheap spells interacting with each other, [card]Brainfreeze[/card] is a very real card and wins lots of games.

[card]Mind Control[/card] —> [card]Standstill[/card] – Same notes as [card]Control Magic[/card]. It is worth noting that [card]Mind Control[/card] is very good in the Puzzle Box list precisely because it is a much slower format. You can be sure that it will get something eventually as the game goes on. [card]Standstill[/card] is amazing in Twos. It will draw your team six cards for two mana so long as you have a slightly better board state than you opponents.

[card]Into the Roil[/card] —> [card]Curfew[/card] – [card]Into the Roil[/card] will usually only be an [card]Unsummon[/card], but its added flexibility is what makes it worth its inclusion in cube lists. [card]Curfew[/card] is the same cost as [card]Unsummon[/card] and you’ll often be able to sculpt a situation where it does twice as much work. Kind of making it four times as good as [card]Into the Roil[/card].

These are the cards that tend to highlight the nature of the format of twos. They may not be the optimal substitutions for the list, but they will send you well along your way to the more fun and complex states that exist in this format.

Other Options

You’ll also notice that the amount of counter spells has been ramped up. I have done this to try and emulate the format that I am familiar with. If you like the play style I described earlier in the post, you could go further and add in a bunch more blue cards, say an extra 15, to make the total size of the cube 275. Some other possible inclusions for that could be the following.

[Deck title=Possible Blue Inclusions for a Twos Cube]
[Spells]
Gitaxian Probe
Compulsive Research
Vapor Snag
Spell Pierce
Dispel
Negate
Complicate
Exclude
Remand
Essence Scatter
Windfall
Unsummon
Annul
[/spells]
[Creatures]
Calcite Snapper
Augur of Bolas
[/creatures]
[/deck]

A quick shout out to the Cubism Podcast. These guys are the real Twos gurus out there. They have been playing it for a long time and know the format inside and out. Check out their latest podcast for an in-depth look at Twos. Hit me up on Twitter, @awcolman, or leave a comment below if you have some ideas that could help me and the rest of us out with our Twos project.

Next time, we’ll cover the black section!

Thanks for hangin’.

Andrew

Serum Visions: The Biggest, Beeriest Beer

Hello, everyone, and welcome back to Serum Visions!

deschutes-barley-wine-bottle-square
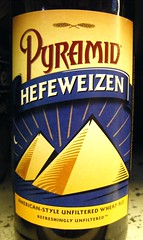
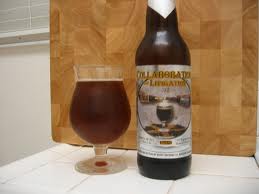
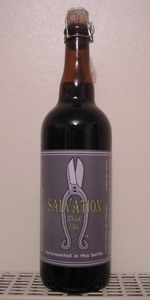
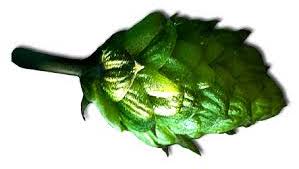
This week, we are going to be talking about the beeriest of all beers. The beer that takes the beer flavors you know and love and makes them larger than life. This week, we are talking about barley wine! The two examples I have of this style on my cellar-shelf at the moment are called Burleywine, by my local micro-brewery, and Thor’s Hammer, by Central City Brewing. You will more often than not find a barley wine with an epic name, because that’s just what the beer is: epic.

Barley wine is one of my favorite beers to bring to gatherings where the people who are in attendance are new to drinking good beer. This is happening more often, which is awesome, because of all the popularity that craft beer is gaining right now. Also, as soon as someone finds out I make beer, they ask me about the process. I’ve gotten my monologue of grain to glass in down to five minutes. After that, people just want to know what the beer I drink tastes like. They seem to have figured out that no one could be so passionate about yellow fizzy water, and so there must be something more to it.

Barley wine must be one of the “beeriest” tasting beers you can get. This is obviously debatable, but I would argue that the flavor of a well-balanced barley wine is almost a caricature of beer. There are simply more beer ingredients per gallon of water than any other classically produced beer (more on this in a bit).  A weak barley wine will weigh in at around eight percent ABV. A stronger example of the style could reside around 13 percent or more. It makes sense that this beer would really taste like beer. Let’s take a look at an edit of the tasting notes from an American barley wine.

Flavor: Strong, intense malt flavor with noticeable bitterness. Hop bitterness may range from moderately strong to aggressive. While strongly malty, the balance should always seem bitter. Moderate to high hop flavor (any variety). Low to moderate fruity esters. May have some bready or caramelly malt flavors, but these should not be high. Roasted or burnt malt flavors are inappropriate.

When I say caricature, I mean to say that all of the signature flavors of beer are accentuated in the same way a cartoonist would accentuate Jay Leno’s giant square chin. In the flavor portion of the BJCP tasting notes, we notice that the two main flavoring ingredients of beer (malt and hops) need to be strong, intense, and aggressive. It needs to be strongly malty but balanced toward bitterness. Any extra-fruity flavors from the esters or extra-malt flavors such as roast or burnt are simply called inappropriate. What I understand when I read these notes is, “We want to taste the ingredients used to make beer and nothing else!”

The way the brewers achieve these qualities is by using more of the ingredients. Ray Daniels, the author of the book Designing Great Beers has this to say about the making of Barley Wines:

“The making of barley wine often turns into an exercise in logistics. Grain brewers will find the limits of their systems severely challenged if they try to produce a full-sized batch of barley wine. In general everything will be bigger than you expect…”

To give some perspective on the amount of grain used to make one, any beer at 4.5 to five percent ABV will have around six pounds of grain per five gallons (the size of a home-brew batch)  This is just under a pound per gallon. A barley wine around 12 percent will have around 22 pounds of grain per five-pound batch. That is just over four pounds per gallon. That is a crazy amount of grain!

A Bit of History

barley-wine-barrels-005

The earliest development of the style is thought to come from the aristocratic houses of England. It was brewed for these houses first because to making it on a commercial scale at that point in England was not feasible.   Because England is not one of the great wine producers of the world, their supply was not always as reliable as might be desired. It was then used a a sort of back up and it would often age in barrels for an entire year before it made its way to the table. Their version of barley wine, which was described to have vinous nature, was brewed when supply of wine was short and there was a need for something to stand in its place at the table.

The first recorded barley wine was commercially produced in Burton upon Trent by Bass Ale. It was called No.1 Barley Wine. It was in both London and Burton where “strong ales” were mostly produced. The difference between the two of them came in part because of the water profile difference between the two cities. Burton on Trent is famous in the beer world because of mineral profile of its water. It has a naturally high carbonate and sodium chloride content which lends itself to sweeter, maltier beers. The London water had a lower content of these minerals and so the beers ended up having more of a hop character to them. It may not be a surprise to find out that London beers were indeed hopped more aggressively and heavily dry hopped. The Burton version of the beer would have little to no dry hopping.

Bass-Lable-BarleywineIt was eventually Bass from Burton that coined the term barleywine and thus set a real starting point for the style. It’s popularity has waxed and waned over the years. Rationing due to the wars and pressures from prohibition pushed the alcohol percentage lower and lower until it was no longer a barley wine. In the US, Anchor Steam picked up the style with Old Foghorn as well as Sierra Nevada with Big Foot. With the advent of the craft beer movement, and even more with the trend of extreme beers, the barley wine style is as healthy and popular as ever. It is often the defacto Christmas beer or specialty beer that a brewery will make in honor of an anniversary or some special occasion.

One reason for its celebratory status is that this is one of the few beers that can be aged for a few years and gain character rather than lose it. In fact, breweries that release a yearly barley wine will often label it with its vintage the same way a winery does. I do recommend that when you are picking up a barley wine to pick up as many bottles as you can justify. I have four beers of a six pack left of the barrel aged Burley Wine made by Half Pints, the one microbrewery in Winnipeg, from 2012. I had one a few months after getting it for Christmas with a friend. The flavor almost literally knocked me off my chair. It was so strong tasting I couldn’t believe it! I then had one a full year later and it had mellowed considerably and was far more enjoyable. I promise when I crack the next one I’ll let you all know how it is.

Style of the Week

Barley wine… of course! I don’t need to expound on it virtues any more. You can find the full BJCP tasting notes here. As always, try to find a local version first. If you can’t find on of those you should be able to find Fog Horn by Steam Anchor or Big Foot by Sierra Nevada.

Thanks for hangin’, everyone!

Andrew

The Puzzle Box: Twos Four-Man Format, White Section

Hello, everyone, and welcome back to the Puzzle Box!Image-2

A couple of weeks ago, I introduced you to what is a staple format in my hometown of Winnipeg, called Twos. I also mentioned how card evaluation changes when you are considering this format. I linked to a really good list that has been built to best suit this format, but it is a powered-not-budget list, and that doesn’t quite fit the theme of this column. In this article, I’m going to go through the list and pick out the cards that are especially suited to playing Twos and swap them for existing Puzzle Box list that aren’t ideal. Many of them will be obvious, but others may not be as clear. This way, if you decide to build your cube around the Twos format, you’ll know what a good card for it looks like. Or if you are like me and play mostly one-on-one, you can create a Twos expansion. My main list is 420 cards and I have an expansion of around 35 cards to bring it up to a 450-sized cube. The reason I have the 5 extra cards is a house rule: if you open or get passed a pack with a creature with defender in it, you can opt to take it out of the pack and ask for a new card. I’ll talk more about this later on.  

A couple of words about the budget aspect of these swaps. The cards I will be advising to switch will not fall into our $200 budget. However, there are some cards that would be great in a twos list that we don’t have, such as [card]Enlightened Tutor[/card], that don’t specifically affect the multiplayer dimension. I will not be including any of these here. All of the cards that I am advocating for serve a purpose in the multiplayer environment. If you can’t afford them, don’t worry about it. Even if you are just playing with the stock Puzzle Box list, this format will still be a blast to play!

Right then, tight then, lets get into some cards

White Section

1. [card]Wall of Omens[/card] —> [card]Syndic of Tithes[/card] – a 2/2 for two with extort, this is a Twos dream. It comes in early, swings for two, and causes a four-point life swing with each extort trigger. If your opponents don’t bolt him the first time around…they will the second.

* General note regarding defenders – they are bad in this format. Because you always have two options of opponents to attack, there is a good chance that one of them will not have a blocker or you or your team mate (TM hereafter) will have a removal spell to get an attacker though.

2. [card]Calciderm[/card] —> [card]Kami of Ancient Law[/card] – Calciderm is not really good enough to be in most cube lists and is mostly in the Puzzle Box as a place holder while you acquire better cards. It’s an easy cut for a good Twos card. [card]Kami of Ancient Law[/card], however, does not seem like a good Twos card. This is folly. Because attacking and causing combat damage is so much more prevalent in this format, the effects that all of the equipment have is magnified because they are much more reliable. Also, there are a lot more enchainments in Twos that are really, really good and demand answers. Having access to an extra [card]Disenchant[/card] that can get in for some damage is really valuable here.

3. [card]Serra Angel[/card] —> [card]Aven Mindcensor[/card] – This swap I would only really recommend if you have fetch lands in your list. [card]Serra Angel[/card] is not bad in a budget-constricted format, but if you have fetch lands in your cube, it is no longer budget-constricted and she gets a lot worse, whereas [card]Aven Mindcensor[/card] gets way better. Image-1

4. [card]Shrine of Loyal Legions[/card] or ([card]Entreat the Angels[/card]) —> [card]Luminarch Ascension[/card] – Shrine and Entreat are simply too slow for this format. Ascension is absolutely bonker-pants! Seeing that they both make an absurd amount of myrs/angels, they seemed like a good swap. Lets look at why Ascension is so good here:

This card wins games on its own: it becomes the plan. Because you have two opponent’s, this counts for two end steps each turn, meaning it activates twice as fast. When playing one-on-one, your opponent can develop his resources for three turns and then just get in some damage when it’s convenient. In this format, opponent’s resources develop at half the speed comparatively and it forces your opponents to make really bad plays. They may send a bolt to your face just to buy an extra turn, or make bad attacks, trading cards they normally wouldn’t just to ding you for one. It’s no coincidence that [card]Cunning Sparkmage[/card] can be found later in the red section…

5. [card]Cloudgoat Ranger[/card] —> [card]Soldier of the Pantheon[/card] – Not much to say here. Five-drops are too slow here, even one this powerful, and swapping it out for a two-power one-drop if just what the doctor ordered.

6. [card]Sun Titan[/card] —> [card]Stonecloaker[/card] – Again, a six-drop that doesn’t just snap win the game is too slow. Even as a reanimation target, there are just better options. As for [card]Stonecloaker[/card], a 3/2 flash flying for three?  Why isn’t this guy in the regular list?  It even lets you re-use your [card]Snapcaster Mage[/card] if you’ve got it. Faster and powerful, that’s the name of the game here.

7. [card]Arrest[/card] —> [card]Path to Exile[/card] – This one is a no-brainer. The only reason Path isn’t in the normal list is cost. If you are moving to Twos, you are going to need faster removal than Arrest.

8. [card]Angel of Serenity[/card] —> [card]Elesh Norn, Grand Cenobite[/card] – Elesh Norn is a one-sided wrath plus team buff plus beater on her own. I realize that this is way out of our budget arena, but she really is much better than the angel in Twos. Its one of those creatures that snap wins the game. Angel does a reasonable impression by removing a pile of their creatures and setting a fast clock. Again, if she’s too much, don’t worry, the format will still be super fun!

9. [card]Gideon Jura[/card] —> [card]Elspeth , Knight Errant[/card] – Gideon is much more a control finisher where as Elspeth plays the aggro/tempo game much better. Seeing as this is an aggro/tempo format, this is an easy swap. 

imgres-410. [card]Pacifism[/card] —> [card]Blind Obedience[/card] – Again, this is an easy swap. Pacifism is only a partial removal spell. Blind Obedience slows what blockers that do come down a whole turn while providing a way to extort that is not tacked on to a creature thus more difficult to remove. I went in to the virtues of extort in my introduction to this format. Check it out here.

Here’s what the final list will look like after all of the swaps are made.

[deck title= The List According to Type]
[1CC Creatures]
Elite Vanguard
Mother of Runes
Savannah Lions
Student of Warfare
Soldier of the Pantheon
[/1CC Creatures]

[2CC Creatures]
Accorder Paladin
Kami of Ancient Law
Kor Skyfisher
Lone Missionary
Soltari Monk
Soltari Trooper
Syndic of Tithes
[/2CC Creatures]

[3CC Creatures]
Aven Mindcensor
Porcelain Legionnaire
Blade Splicer
Fiend Hunter
Flickerwisp
Mirran Crusader
Stonecloaker
[/3CC Creatures]
[4CC Creatures]
Hero of Bladehold
Kor Sanctifiers[/4CC Creatures]

[6+CC Creatures]
Elesh Norn, Grand Cenobite
[/6+CC Creatures]

[Planeswalker]
Elspeth, Knight Errant
[/Planeswalker]
[Instant]
Condemn
Mana Tithe
Swords to Plowshares
Disenchant
Path to Exile
[/Instant]

[Sorcery]
Balance
Armageddon
Day of Judgment
[/Sorcery]

[Enchantment]
Luminarch Ascension
Journey to Nowhere
Blind Obedience
[/Enchantment]
[/deck]

Feel free to scour Gatherer and try to find some other cards in white that would be better than the ones we have (for the Twos environment, of course), and post them in the comments. This is not a heavily discussed format across the internet, so there might still be some gems out there that have been missed.

I need to give credit once again to PIDGEOT on CubeTutor for use of his list as a basis for these articles. Also, all of the guys at Fusion Games in Winnipeg who have been playing this format for years and who introduced it to me. Thanks very much!

Let me know if you have jammed this format yet and what you think of it. I’ll try to get two colors in for the next article, but there is so much new stuff to say about these cards that I make no promises. You can catch me at @awcolman on Twitter if you want to chat about this or anything else Cube- or beer-related.

Thanks for hangin’, everyone.

Andrew

Serum Visions – Things We Collaborate On

Hello, everyone, and welcome back to Serum Visions!

This week, WotC has announced that it is doing a set of “designer cards” with game designers from outside of Magic’s  R&D. This is a great opportunity to talk about an amazing part of the craft beer culture: collaboration beers [CB]. This is really exciting and quite timely because we just had the first Collaboration Beer Fest in March as a part of the Colorado Craft Beer Week.

There has been some pretty cool news on the mothership as of late regarding M15. This will be the set where we get the card that the community got to design: [card]Waste Not[/card]. It turns out that we are not the only ones from outside WotC that got to contribute to the design of this set.

There is a video of George Fan, the designer of the incredibly popular Plants vs Zombies, talking about how he was the one who designed [card]Genesis Hydra[/card]. It’s a pretty cool video—George talks about how he has been playing MTG since Revised and he had a mechanic in Plants vs Zombies, in initial testing, that was a direct inspiration from MTG. WotC got designers from some pretty big-name games to take part in their “designer cards” program, such as the creators of Penny Arcade, Minecraft, World of Warcraft, and Diablo 3, just to name a few.

Collaboration is a Beautiful Thing

Salvationimgres-2 OLYMPUS DIGITAL CAMERA

I’m not sure which was the first collaboration beer, but I can tell you which one really sparked the fire. The head brewers from Avery Brewing and Russian River Brewing, two very big names in the craft beer world, became friends. I’m sure it was over a beer that at some point they realized that they each had a belgian beer in their lineup called Salvation. In corporate America, this would have shattered the friendship instantly. They would have been on their phones, while still at the table, with their lawyers claiming they came up with it first and slapping each other with lawsuits before they finished the pint that was in front of them… Let’s thank God that didn’t happen! Instead of talking about who should give up the rights to the name, they decided to take an ecumenical approach to blend the beers. The name of the beer came from one of the the brewer’s wives who shouted, “We should call this “Collaboration, not Litigation Ale!” Two years later, they got together, took this idea, and made it big!

Just to be clear, this blending of beers is not the same as blending of wines. The two brewers sat together in a pub and discussed the highlights of each beer and then designed a recipe that would bring out the best of each of the two. This approach has now been adopted by enough brewers that there was, very recently, the first annual Collaboration Beer Festival in Denver.

Beer is Fun

Collaboration beers are such a natural evolution of the craft beer culture, I feel like the evolution itself needs a word. If we think about why many of us drink and love beer, the answer probably revolves around hangin’ with friends or meeting people. Almost all brewery owners started off as home brewers. Brewing is fun, but brewing with a company is more fun, and brewing with other brewers is way more fun! This is why I try to teach everyone I know how to brew. It was only a matter of time before the craft brewers of the world figured out that brewing with other brewers with other ideas is way more fun. Beer is fun, so the explosion of collaboration beers represents the furthest extension thus far of going out for beers with your friends.

When I say explosion of collaboration beers, I really mean explosion! Not ten years past the first big name CB do we have a festival with 37 different brews at it. The CB Beer fest was the headline event of the Colorado Craft Beer Week [CCBW]. It’s a nine-day event that features many of the breweries, brewpubs, and restaurants involved in the Colorado craft beer scene. This will be the first time in the history of CCBW that they will have breweries from outside of the state participating. There is actually one beer that had five different breweries collaborating on it. Does the final product taste any different than if it had only been four breweries? Maybe, maybe not, who cares?! It was a bunch of brewers getting together, hangin’ out, and doing something. It just so happens that they get to make awesome beer while they are hangin’, and we get to buy and drink it!

 Coveralls, Bands, and Beers

imgres-3

Collaborations do not just happen between breweries though. The most visible example of this is Bitches Brew, done by Dogfish Head. In the television show Brew Masters, a reality TV show that features the day-to-day of this brewery, Sam Calgioni got a call from Sony Music to make a beer for the 40th anniversary release of Miles Davis’s hugely influential album Bitches Brew. Bitches Brew introduced the fusion of electronic elements into the jazz idiom. It is widely acknowledged as the first fusion album. After seeing Jimmy Hendrix play, Miles took the instruments of the white rock and roll culture and blended them into the predominately black culture of jazz, creating fusion. This is the inspiration that Sony asked of Sam. Sam ended up blending a black imperial stout and a honey beer with gesho root. Sam actually wrote part of his business plan while listening to this album because it is what he wanted his brewery to be: different from everything that came before. They say nothing is new under the sun…Miles and Sam would disagree.

Collaboration beers don’t stop here, though. There is a brewery up here in Canada called Flying Monkeys that did a chocolate stout with the band Bare Naked Ladies. They collaborated to make an imperial chocolate stout to kick off their Symphony Barenaked tour that was about to start. Another collaboration that is happening right now is between the New Belgium Brewery and the work-wear company Carhartt. Carhartt has been making high-quality work-wear for 125 years and they decided to celebrate by being part of the design of a beer. Honestly, it’s part good marketing to jump on the booming craft beer collaboration movement. However, they also get to be a part of making beer with a company that shares their values in high quality products for craftsmen.

The trend that craft beer has been following lately has been of exponential growth. I see no reason why this trend should not cross over to collaboration beers. Keep your eye out for multiple logos on beers at you local beer store and be excited to pick them up and learn about what new thing is happening. This is an exciting time in the beer world!

Style of the Week

This week, there is no particular style to go out and explore. Go to your nearest liquor store and ask to see some collaboration beers. There is pretty good chance that you’ll find one. If the CB is a stout, see if you can find a stout by one (or both) of the breweries that participated in the CB. Take them home and do a side by side comparison between them and see what differences you can find.

Thanks for hangin’, everyone.

Andrew


P.S. If you are in the Greater Toronto Area in September and want to learn to brew, hit me up. You can find me on Twitter at @awcolman.

Puzzle Box – Four-Person Cube Format: Twos

Hello, everyone, and welcome back to the Puzzle Box!

These last couple weeks have been pretty fun! I know there are at least a few of you who have been trying out the formats I’ve presented here. That is really flattering—thanks, guys! This week, I am going to be continuing of this meta-series (as Mark Rosewater puts it in his podcasts) of little-known Cube formats. This week I’ll be leaving the world of two-man formats and moving into four-man. This format is simply called “Twos.”

What is Twos and How Do You Play?

imgres

  • Twos is a format that has two teams of players who share a life total of 25. Teams are randomly chosen as team A and team B. Players sit in ABAB order to draft so team mates are not sitting beside each other. Draft as normal: three packs per person.
  • Once each person has his or her draft pool, players build their decks apart from one another so no one knows what’s in anyone else’s deck—including team members!
  • After all of the deck are built, players sit in the same order around the table—ABAB.
  • The person who plays first is randomly decided. Turns go in clockwise order, and the first player draws.
  • Each team member may attack either one of his opponents, and any damage that gets through decreases the team’s shared life total. Team members cannot block for each other. However, they can play spells that affect either a creature or spell that is targeting their other team mate. For example, if an opponent is attacking your teammate with a [card]Baneslayer Angel[/card] you can [card]Doom Blade[/card] it, but you can’t block it with your [card]Lingering Souls[/card] token. You can counter a [card]Lighting Bolt[/card] that is targeting a teammate’s face or creature, or counter a counter that is countering your teammate’s counter. All that is to say: everyone can affect everyone else within the normal rules of Magic.
  • No sideboarding
  • After the first game, the two team members on the losing team roll to see who goes first for the next game.
  • Discussion between team members is allowed. You can tell your teammate what’s in your hand and the contents of your entire deck. The catch: nothing can be said in secret—if you are going to say something it must be said so the opposing team can hear.
  • Best two out of three wins it.
  • At my local shop, players often put a few dollars on the line to make things extra spicy.

This Format is F-A-S-T

If you take a second to think about how fast the normal 1v1 cube environment is, you’ll realize that it is pretty fast. Two-power one-drops are an absolute staple, and as WotC continues to make better ones with fewer draw backs—like our dear friend [card]Carnophage[/card]—it is trending toward speeding up even further. Anything that costs five mana should be a game winner. Anything that costs six or more will require you to have a deck full of sweepers and counter spells, ways to ramp to it in the early parts of the game, or a plan on cheating it into play without paying its mana cost.

Now just take everything you just read, then remove any consistent expectation of blocking from the equation. Chances are good that either you or you teammate will not have a creature to block an opponent’s attacking creature, and if both of you do, the chances are equally as good that an opponent will have a way to clear the path.

Extort Matters!

Your valuation of cards changes drastically in this format as well. Here is a pack-one pick-one scenario that I saw a couple of weeks ago: the two cards in the pack that really mattered were [card]Skullclamp[/card] and [card]Guttersnipe[/card]. Snap [card]Skullclamp[/card], right? It goes in every deck with creatures and [card]Guttersnipe[/card] will wheel if you feel like playing that deck anyways…right?

WRONG!

Let me describe a late-game scenario that will show you the power of cards that specify “each opponent.”

It’s my turn five and I attack my opponent’s life total down to three. One of them does not have a blocker and my teammate has an army that only a sweeper could handle. We are 11 life. There’s a catch: the opponent to my left has a Guttersnipe out, three untapped mana and a single card in hand.

Spoiler Alert: Take a second to try and figure out what card that could be that would let them win on their upkeep.

Image

At the end of my turn, he plays a [card]Staggershock[/card] targeting my face for two. [card]Guttersnipe[/card]’s ability triggers and hits me for another two and then my teammate for two—that’s six damage for three mana at instant speed. [card]Staggershock[/card] then rebounds and domes us for another six, ending the game during my opponent’s upkeep. That is 12 damage for a total investment of six mana and two cards. This may sound like Magical Christmas land, but the guys that I have played with know the power of this card, so this Christmas scenario comes up often.

There is only one Twos list on Cube Tutor that I know of, and you may notice that some of the cards look pretty strange. As soon as you realize that all of those cards affect each of your opponents separately, and that teammates share life totals, those cards skyrocket in value! [card]Tithe Drinker[/card] is one of the best two-drops in the format because it attacks for two and drains the opposing team’s life total for two every time you extort, not to mention two life for you on each trigger. It’s not uncommon to see [card]Tithe Drinker[/card] lowering your opponents’ life total by four each turn it’s alive.

Potentially Very Different Lists

A cube list that is specialized towards playing Twos looks very different and tries to exploit speed and multiple-opponent effects. For instance, every cheap card with extort goes in, cards that are very good at blocking and stalling to get to the long game get cut. Cards like this would be [card]Wall of Omens[/card] and [card]Wall or Roots[/card], or anything that only blocks.

General value creatures that are above four mana need to be seriously reconsidered, and most likely replaced with a one- or a two-drop. Because of the higher concentration of X/1’s, cards like [card]Gut Shot[/card], [card]Lava Dart[/card], and even [card]Forge Devil[/card] become playable and often are key cards in a match.

You can, of course, use more of a standard cube and it will be just as fun. Just keep in mind the environment is really different.

In closing, if I haven’t conveyed that this format is a real blast to play, I’m afraid I haven’t done it justice! This is by far my most favorite way to cube. I like it better than 1v1 for sure, simply because of the team aspect of it. Trying to talk in code about whether or not to [card]Force of Will[/card] something, and then just giving up and talking about the cards in your hand, makes the mood really light and fun!

Alright, I’ll be back next week with substitutions for our current Puzzle Box list, but for now, give Twos a try! You’ll enjoy yourself immensely, I promise.

Thanks for hangin’, everyone!

Andrew


P.S. Shout out to PIDGEOT on Cube Tutor for letting me use his list as a reference. Here’s another link.

thumbs_43

Serum Visions: Stout, the Barroom Black Hole

Hello and welcome back to Serum Visions, everyone!

This week we shall be looking into a specific style of beer: stout. I plan on making one in the very near future and so I have been reading up on the process, which is a great opportunity to share some of my learnings with you here.

Home-Brewers are the Best

I was recently talking to a home-brewer  friend of mine and we were chatting about hops. I mentioned that I needed to go to the local home brew shop (LHBS) to pick some up for my next beer. He let me know that he had close to a pound of hops in his freezer that were getting close to their expiration date. He had no free carboys in which to brew, let alone to brew a pound of hops worth of beer (for context, an average IPA will have four to six ounces of hops per five gallons. So a pound of hops will make about fifteen gallons of IPA). He asked me if I minded buying them considering I had plans on using them right away. “Sell ‘em to ya cheap!” That was a no brainer, so off I went to David’s place where I got just under a pound of hops for $15. If you’ve been reading this series, you’ll know that is dirt cheap! Anyway, for whatever reason, David also had an extra 44 pounds of Six Row malted barley on hand, so I left with eleven pounds of grain as well. I have to say, I am grateful for such generosity! As a passing comment, my friend said it was a good base malt to make a stout, and that was it. I’ve decided to make a stout.

Up until then, the only stout I have made was a Belgian chocolate stout. This is not a typical version of the style, so I figured I needed to learn about it before I dared try a classic version of it.

Luckily for me, a guy named Ray Daniels has written a fairly comprehensive book on many styles of beer called Designing Great Beers: The Ultimate Guide to Brewing Classic Beer Styles. Ray offers good science and charts on how to land a beer within it prescribed parameters according to competition style guides, but he has done so much more than that: he has provided the rich histories of the styles he highlights in the book. This way, if you are trying to brew a beer that is true to its origins, you’ll be able to start from its roots, understand its purpose, and innovate within tradition (if you so choose_.

So What About Stout?

stout

“An almost mystical character surrounds the stout for some reason. Perhaps it is the blinding blackness of the brew as it sits in the glass—a sort of barroom black hole so intense that it might absorb everything around it. Of course, the flavor is just as striking. Those who finish their first glass often become converts, swearing allegiance and setting off the sybaritic search for the perfect pint.”

This is the opening paragraph from the stout chapter in Daniels’s book. As is custom when quoting at such length, I must offer a false apology and insist that no words more beautiful could be offered about the beer, so I might as well use them as they are.

The stout started off its life as a porter. It was not considered its own style until 1820. At this time, we see a beer being commercially described as a stout as opposed to a porter. Up until this point, stout was being used as an adjective, meaning stronger in alcohol content. In the beginning, a porter was a beer designed to “slake the thirsts” of the laborers of the industrial revolution of England in the early 1700’s. A pub-goer would ask his bartender for a stout porter if he were looking for the the stronger version of a dark ale. The color of the beer would not have been the black hole black that we are familiar with today. Rather, it would have been a dark brown beer, because the invention of black patent malt did not come until 1817. The stout was one of the most highly-hopped styles available. This was a compliment to the bitterness offered by the blackened malts and the very dry finish. There can even be an ashy note to the beer because of the amount of the black malt that has been added.

When tasting modern classic stouts, you’ll often find a coffee or dark chocolate aroma. The flavor notes, taken from the BJCP,  are moderately roasted and a grainy sharpness. There could be an acidic sourness and, as mentioned before, there should be lots of hops. The finish will probably have some sort of chocolate flavor, either bittersweet or unsweetened.

The Importance of Guinness to the Style

Stout had evolved for around 70 years before Arthur Guinness decided to stop production of all beer at the famous St. James Gate brewery in Dublin other than porter. Around 1820, the once-labeled “Guinness Extra Stout Porter” had the porter dropped from its name and got the name by which we know it today: Guinness Extra Stout. The style grew and thrived because Guinness was a brewery that was focused on innovation and progress. One of the key innovations that the company adopted before any other brewery was the practice of sparging. This is when a brewer runs a second round of hot water over the mashed grains which have already been drained of the first runnings of wort. You can think of it as rinsing: you never get something completely clean without rinsing, and this includes rinsing sugars off of mashed grains. This means they could make more beer/product to sell without using more ingredients! In the end, this practice produced 20% more beer than they had been producing before.

You may realize that things have changed since Guinness first started brewing its porters and stouts. As I’ve said, a person would walk into a bar and ask for a stout version of a porter, expecting a porter with a stronger alcohol content. However, if you go and buy a Guinness in North America today, you’ll end up with a beer with lower alcohol content that Budweiser (4.2%). Apparently, the Guinness is much different in Ireland than it is here. If you have had it it its native land, leave a comment or hit me up on Twitter, @awcolman, and let me know! I’ll be there this summe,r so I’ll let you all know first-hand when I get there.

[card]Last Thoughts[/card]

I’d like to close by talking about some stouts that are not Guinness. There are sweet stouts: these often have either oatmeal added to the grain bill, which would make an oatmeal stout (surprise, surprise!). Another kind has lactose, or milk milk sugar, added to the beer later on in the process, which results in a milk stout—more surprises! Daniels refers to this style of beer as “the perfect beer to drizzle over vanilla ice cream.” Another very popular version of stout is the Imperial or Russian Imperial. This is basically a stout that has been ramped up to 8 to 10% alcohol. These are great beers to buy and age for a couple years. It lets the flavor develop like a fine wine. By far, one of the most interesting of all beers in general is the Oyster Stout. This is a beer that can have actual oyster meat added to the boil. There is little written on the subject, but I’ll take a shot at how this style may have come about. Someone, at some point, figured out somehow, that shell of an oyster could be used as a fining or clearing agent. They noticed that it imparted a strangely enjoyable flavour to the beer, so the next time they were brewing, and had had a few too many, decided to throw the whole oyster into the boil and found out that it tasted great. This is pure speculation, but it seems plausible…

Style of the week: St _ _ t

Take a guess! Full BJCP tasting notes are here. As always, try to find a local offering before defaulting to Guinness. This time, however, I would say to get the local version and a Guinness and taste them side by side (do a blind tasting if you can) and see which one you like more. Maybe the guys who have been doing it for over 250 years are doing it right!

Leave me a comment. I’m sure we have all had a Guinness at some point in our lives. So let’s get talking about it!

Thanks for hangin’, everyone!

Andrew

The Puzzle Box: #Value Sealed, a Two-Person Cube Format

Hello, everyone, and welcome back to the Puzzle Box!

It’s the end of the month, and that means that we are going to review the Puzzle Box list and make sure it is within a couple dollars of our $200 mark. There are a few changes to be made but we’ll discuss those later. First, I want to talk about another one of my two-man Limited formats.

Getting Value From Your Cube

One of the missions I have adopted in this column is to help those who don’t get to cube too often use their cards to their fullest value. We have these awesome cubes and spend tons of time thinking about cards, saving for cards, swapping cards in lists, sleeving them, reading about them, etc. What is interesting is that the amount of time I have actually used the foil [card]Cryptic Command[/card] in my cube is minuscule compared to the amount of time I pined over it in my LGS’s pimp binder. My goal is to get these cards in play more often during the time I have to use them.

Let’s define use of cards. By this I mean the amount of time you have any card in a deck, in your hand, on the battlefield, or on the stack countering some other spell. The last format I wrote about maximized the amount of drafting you and one other person can get out of your cards. Drafting is one of may favorite parts of cuing. But this week is about having those cards in the in deck, on the battlefield, and countering other spells (and by the way, if you’re not countering spells with your instants, you’re doing it wrong).

I used to do Winchester and Winston drafts in the early days of my cube, but the decks were too clunky and the game play was not enjoyable enough to merit the time it took to draft and build the decks.  Along with this, because I have a craving for adapting to metagames, I try to have my formats with mini-metas built in to them.

With this format, you’ll play some clunky decks, but you’ll spend very little time building them so the overall experience will balance out.

QuickRubiksCube

#Value Sealed

This is a Sealed format. It’s an evolving one and you start slinging spells right away! How is that you ask? You start with a little-known format called Tenpin. I Found this one on the Mothership while looking for some different formats to play. There are six steps in total to #Value Sealed.


Step One

Option one

Each person takes one booster from the cube, takes 10 cards from the pack, chooses up to six basic lands and shuffles it up to make you first deck.

or

Option two

Mini Masters: each person takes a pack, shuffles in 2 of each basic land in and then you jam. This options is faster, but it leads to clunky decks and with this format we are trying to balance clunk and speed. In this case I feel like the time it takes to cut five cards and choose six basic lands is worth it. #value

You have your decks, so now play best two of three. The whole match will take a while so don’t be too concerned about eking out games.

Step Two

Each player takes another booster pack and adds it to the pool of cards from which they are building their decks. At this time, your deck is going to move up to 20 cards.

You will probably be able to move in to two colors at this point. You’ll also have an idea of what the strongest card in your opponent’s deck is, indicating which overall archetype he may be leaning toward as more cards are added to your pools. It’s now time to start thinking about how to beat that next deck. Mini-meta! To be fair, you probably wont have many options to deal with it, but if you see that he has [card]Umezawa’s Jitte[/card] in his pool, you are going to make room for any disenchant effect and maybe even try to force a color to access it.  The chance of drawing any one card in a 20-card deck is very good! For that reason, if you open some silly off-color bomb in your second pack, it may be worth completely changing the plan for subsequent games.

Step Three

Add another booster to your available pool of cards and continue to rebuild your 20-card deck as you see fit.

Step Four

Add another pack. Here we have reached our first “sanctioned format.” This is four-booster Sealed, and in this format you are going to bump your deck up to 30 cards. It’s generally advised that you put 12-13 lands in these decks.

Step Five

Add another pack. You can use your own judgement whether you want to go up to 40 card decks this step. Two things to consider:

If you stay at 30 cards, you will almost certainly have enough cards to build two different competitive decks. Feel free to switch up between these decks during the match if that is something that appeals to you. If you are going to do this, decide beforehand so you can keep it in mind during the whole process.

If you go to 40 cards, you will be using more of your cards more often, and that’s the whole idea of this format. Your decks will not be as streamlined as if you were playing 30-card decks. Here we find the beauty of Cube: if you do it one way and don’t like it, you haven’t lost money and you’ve still been playing Magic!

Step Six

Add another pack. Here we have finally arrived at the Sealed we all know: 40 cards, 17 lands. A couple of general notes:

I’ve tried adding two packs step three and four (1, 2, 4, 6), but it turned out to be a little out of line with the goal of this format. Thirty extra cards is way to much information to process to keep the build time fast enough. But feel free to start at any point in the process, if you want to start at two or three packs and work up from there, do it!

And There You Have It

This format gets you playing lots and playing fast! It’s super fun to have a controlling deck game one and watch your opponent make his deck faster in the second game to  try and punish you for it. Then comes around pack/match three and you finally get that second mana elf. You proceed to slam a [card]Predator Ooze[/card] on turn two and watch your opponent squirm.

I haven’t played with a best three of five or anything like that, because the idea is to play and adapt to the environment and your card pool.  There was one time that the pool for my opponent had [card]Umezawa’s Jitte[/card] and [card]Jace, the Mind Sculptor[/card] pack one and then [card]Stoneforge Mystic[/card] pack two. We didn’t play that one out because it was a little crushing to be so obliterated from the very beginning. Thus is the nature of Sealed play.

Two-Man Limited Format Choices

If you would like a thoughtful and draftful evening, check out my previous format, Infinity Drafting, here. If you just feel like jamming game after game after game in a fast-moving environment, try this one. Either way, put Winchester and Winston aside and try something new!


Changes to the Puzzle Box List $218—>$202

[card]Entreat the Angel[/card] —-> [card]Shrine of Loyal Legions[/card] – Token spam

[card]Jace Beleren[/card] —–> [card]Compulsive Research[/card] – Sorcery-speed card advantage

[card]Cursed Scroll[/card] —-> [card]Razormane Masticore[/card] – Not close at all, but they both give free shock/bolts and are in the artifact section (If you have a better idea let me know, either in the comment section or on Twitter, @awcolman.)

If you try one of my formats, let me know how it goes and any tweaks or overhauls you might make to them.

Thanks for hanging, everyone!

Andrew

Serum Visions – GP Montreal Local Fare: Unibroue Brewery

Hello, everyone, and welcome back to Serum Visions!

This week is the recovery week from poutine and the four-liter pitchers of beer than can be found in lovely Montreal. One of Canada’s most famous breweries can be found around a half-hour drive from the city in a town called Chambly. The brewery is called Unibroue, and it’s offerings can be found as far south as California and as far north as Alaska, and of course, right across Canada.

imagesI was recently a guest on a beer podcast where we talked about everyone’s “most important” beers in their craft beer drinking career. Up there on my list was Trois Pisotle/Maudite by Unibroue.  While I was doing my jazz degree, I attended a  weekly concert in the French section of Winnipeg called Mardi-Jazz. (Tuesday Jazz) One evening, I noticed people drinking a beer called Fin du Monde—it’s a 9% Belgian-style triple and it has got a kick!  I took a closer look at the beer fridge and saw all of these labels that had incredible artwork on them with funny-sounding French names. “I’ll take a Trois Pistoles please.” The cap popped off, the beer poured into a glass. It was mahogany red and had head that would make you blush. Upon first sip, the world of craft beer had been opened up to me. There was beer in this world that didn’t taste like “beer.” You know, a beer that tastes like malted grains, whether it be light malt, roasty malt, or chocolate malt. Nor did it focus solely on the hops like so many double IPAs I love. No, this was something new. It was using all of its ingredients to create a new flavor dynamic. It tasted like port, chocolate, dates, raisins, pepper, clove, bananas, and all sorts of things. It was a beer that didn’t taste like beer. At that moment, beer lost all boundaries: it went infinite.

Why do I share this? Because, this is first and foremost a beer education series. If you didn’t know things like this existed, how would you ever find out? Alright, enough sap, lets talk about the brewery.

Unibroue

Unibroue is a fairly young brewery compared to its Belgian role models. Its beers have a very unique flavor compared to most Belgian and Canadian beers that comes from the same yeast. When a commercial yeast producing lab released their signature yeast to home brewers, it was called “Canadian/Belgian.” All of the their beers are “on lees.” This means that they do not completely filter it, but instead leave some of the yeast in the bottle to allow it to “bottle condition,” or ferment a second time. This causes the beer to naturally carbonate. When the yeast is done fermenting, the extra fermenting sugar goes dormant and settles at the bottom of the bottle—this is the lees. The brewery claims that this process adds to its signature flavor. If you have had more than one of these beers, you’ll be able to attest to the particular yeast character that each of them have. When Unibroue released its Blanche de Chambly, it made history by being the first abbey ale—beer on lees—from North America. Another extraordinary achievement they have accomplished is is being one of North America’s most-awarded breweries, with 183 medals! You can go to Unibroue’s website and see the endless list of them here. Among its most highly-honored beers is La Fin Du Monde, which is the most highly-awarded beer in Canada.

Trois_Pistoles

Each of the signature beers are named after stories or legends from the area. Trois Pistoles is named after a small town in Quebec. The legend goes that there was a large black horse of great strength that helped move giant stones needed to build a church. For some reason, it was known that the horse had to stay bridled, or else! One of the workers thought this to be unfair and unbridled the horse to give it some water. The great black horse vanished and the construction of the church was not completed. You can go to Trois Pistoles and see where there is a missing stone in the church to this day. There is a second version of the legend, where the bishop conjured up a “good devil” to help with construction. The bridle was removed before completion and the horse vanished, leaving the church unfinished.

This craft brewery was actually the brainchild of two businessmen from Quebec who, while in Belgium, saw a completely untapped market in North America of readily available abbey-style beers. They came back to Quebec and acquired another brewery and merged it with their own company. Once it was acquired, they found a master brewer in Belgium to teach them how to make abbey-style beer. In 1992, they released the aforementioned Blanche de Chambley. The company grew at an extraordinary rate because it was being treated as a business rather than a hobby gone too far. Where many brewers are concerned about not growing too fast because of potential loss of quality and control, growth seemed to be Unibroue’s goal. The company was purchased by Sleeman’s in 2006, and then Sleeman’s was purchased by Sapporo in 2008. Unibroue still makes great beers and I continue to buy them every once and a while. They have claimed that all that has changed is the ability to exact more control and have wider distribution. Perfect!

I am a great proponent of local beer and most other things for that matter. But this story raises some questions. I would not say that Unibroue can be considered a microbrew anymore—it’s owned by a huge corporation. It’s worth asking whether or not these beers ought to be avoided like BudMillerCoors (BMC) beers. If this beer was created as a product to make money, rather than out of a passion for beer, does that make it somehow a less reputable or a principally objectionable product? Or do we thank our lucky stars that someone brought to us such a wonderful beer, and leave their intentions out of the discussion? I think here we are getting into territory outside of this particular article’s scope. If you would like me to dig into this topic later, hit me up on Twitter, @awcolman, or leave a comment below. Lets talk about either how great Unibroue is or what you think about the companies corporate journey and what it may imply.

Style of the Week: Belgian Quadruple or Belgian Dark Strong Ale

This is the style in which Trois Pistoles resides. Things you’ll be looking for while tasting are raisins, plums, dried cherries, figs and prunes. Full BJCP tasting notes here.  Of course, if you can find a local offering grab that first. If not, you can look for Trois Pistoles by Unibroue or St. Bernardus Abt 12, which is a genuine Trappist abbey ale and by far one of my favorite beers. If you cant find either of those, Chimay Grande Reserve (Blue) is fairly easy to get a hold of. If not any of these, be sure to ask—you may be surprised by what you’ll learn or who you’ll meet!

Thanks for hangin’, everyone.

Andrew

The Puzzle Box: Specializing the Archetypes – Artifacts

Welcome back to the Puzzle Box!

This week, we’re starting into the next chapter of the life of this cube list. Archetype revisions are a really fun part of being a cube manager. Today I’ll be diving into the artifact archetype and swapping some cards to make it come alive. This deck can be a real contender in your drafts if you decide to include it in your list. I hope you enjoy it!

Inspiration

I recently had an intensive weekend course. It involved spending every night with my class and professors from a Wednesday evening to a Saturday evening. There was lots of reading to do, and it was all seminar/discussion format so everyone actually had to do all of the reading, and do it carefully!

feat217a_inspiration

Needless to say, there wasn’t much cubing going on leading up to that weekend. It had been about a month betweenmy last infinity draft. When I finally got back into it, the packs were on my side! BLUE BLUE BLUE! I drafted the ol’ seven counterspell draw-go deck of your dreams. My finishers were [card]Wurmcoil Engine[/card] and [card]Aetherling[/card]. I unfortunately came up against a mono one-and-two drop Boros aggro deck and got slammed! I proceeded to not switch to my aggro midrange deck game two, because I just wanted to see if I could do the impossible. Nope. I forced my opponent to switch decks and I moved to my  more aggro midrange deck. It turned out that his other deck was midrange control with a ton of removal. Down I went again. It was late, so that was the match. I went 0-3 because I did not let the meta tell me what deck to play. Instead I played the deck I felt like playing. I cant say I’ll ever do that again. Drafting for an hour and building awesome decks to get blown out when it really wasn’t necessary was not very fun. But getting a full study in metagaming felt good a few days later. This is really a great format.

A thought occurred to me while drafting that night that pertains to our project here. My draw-go deck came together so well that I thought the packs must have been seeded with blue. So here’s my thought: if you were to infinity draft with the Puzzle Box, you would be seeing 12 of 18 packs. That’s a very high percentage of your cube in use at any one time. Some people could see this as a negative in that the variance of the drafts is going to be very low. Okay, sure. That could certainly be the case. But where other people see a negative, I almost irritatingly force a positive. The positive is that you can very consistently play archetypes that may not have enough support cards in a larger cube.

The next project lined up for the Puzzle Box will be to create archetype packages. These will work by substituting a certain number of cards from the stock list with the archetype package. I am going to be a little bit more liberal with the budget because this is going outside of the initial project. I won’t go too crazy, though.

Artifact.dec

Artifact.dec Packagewp_tezzeretagentofbolas_1280x960

[card]Tezzeret the Seeker[/card] <> [card]Enclave Cryptologist [/card]

[card]Tezzeret, Agent of Bolas[/card] <> [card]Far // Away[/card]

[card]Academy Ruins[/card] <> [card]Noxious Revival[/card]

[card]Goblin Welder[/card] <> [card]Fire Imp[/card]

[card]Inkwell Leviathan <> [card]Frost Titan[/card]

[card]Karn, Silver Golem[/card] <> [card]Mortarpod[/card]

[card]Basalt Monolith[/card] <> [card]Erratic Portal[/card]


Optional

[card]Tolarian Academy[/card]

[card]Mox Diamond[/card]

[card]Chrome Mox[/card]

The first and most common unique archetype you see is the artifact archetype. There are so many good artifact-centric cards that it makes it easy to support this one. It is most often seen in powered cubes because of the abundance of fast mana artifacts. For us, the fact that each of the guilds has a mana rock should make up for it.

What this deck is trying to do is be a blue-black control shell with as many artifacts as possible. You’re going to be wanting to grab all of the artifact mana, regardless of its color. Jam down as many many rocks as possible and get out a [card]Sundering Titan[/card], [card]Inkwell Leviathan[/card], [card]Myr Battlesphere[/card], or [card]Sphinx of the Steel Wind[/card]. You could say it is trying to be a robotic green deck. Some people really don’t like that green has to fight with artifacts to be the only ramp-style deck. I think it’s fine. It can be lots of fun to have a battle of fatties. The artifact deck does get [card]Tinker[/card] in this list and green does not get [card]Natural Order[/card], so it may be skewed a little to the artifact having the advantage when it comes together. The other side of the argument is that almost all of green is dedicated to the ramp plan, whereas pieces of the artifact deck will be picked up by other drafters at the table due to the lack of fixing. It balances out nicely.

Some comments on the cards going into the cube. The two Tezzerets are essential. It’s both or none, and if it’s none don’t bother with the archetype. [card]Tezzeret, Agent of Bolas[/card], can go down on turn three with a signet and be swinging for five damage on turn four while providing his own protection. Then he starts drawing you cards for the rest of the game. [card]Tolarian Academy[/card] is much better than TAoB but can lead to some very un-fun games. I would not feel bad leaving this out due to its power level (and cost).

I am swapping out [card]Frost Titan[/card] for [card]Inkwell Leviathan[/card], just as another [card]Tinker[/card] target and something to draw into with TAoB. [card]Academy Ruins[/card], [card]Karn, Silver Golem[/card], and [card]Basalt Monolith[/card] are very good value cards in the artifact deck. They don’t do anything in particular but they make the cut because they do well in other decks and support this one.  [card]Goblin Welder[/card] will be a splash in this deck, but it’s basically a specialized reanimator/[card]Tinker[/card] here.

As for the Diamond and Chrome Moxen: I highly recommend these as an upgrade to the basic cube. The obviously make any deck better, but especially make this deck shine.

upheaval_medium

A couple of other cards that I’d like to bring to your attention already in the list are: [card]Upheaval[/card] and [card]Thirst for Knowledge[/card]. If you are fairly new to Magic and you haven’t seen the ridiculous power of [card]Upheaval[/card], contemplate the following scenario: you play all of your mana rocks, tap them and your lands to float 10 mana, play [card]Upheaval[/card] for six leaving four floating, play all of the mana rocks you just picked up with your floating mana, and restart the game three or four turns ahead of your opponent. If you have never played with this card, just jam it in your next blue deck. You’ll see.

Let me know what you think of this new side project, cards I missed for this archetype, or cards I’m crazy to be cutting. Hit me up in the comments section below or you can catch me on Twitter, @awcolman.


As always everyone, thanks for hangin’.

Andrew

Serum Visions – Tarmogoyf and Saaz: Kindred Spirits

Welcome back to Serum Visions, everyone!

I am writing a finance article this week! After a couple of months of process articles that weren’t particularly inspired by MTG, I think it’s time to take it back a little. With our favorite green creature reaching a very upsetting $200, and [card]Misty Rainforest[/card]s and [card]Scalding Tarn[/card]s both fetching $100 on SCG, it seems like a good time to talk about the supply and demand of our favorite green flower and it’s journey into scarcity and luxury.

tarmogoyf-reprinted

images


When I first started home brewing with some regularity, I was making trips to the local home brew shop (LHBS) almost weekly. As I have said before, I had multiple five-gallon carboys fermenting, one three-gallon carboy, and any number of one-gallon batches of beer going all at once. I was determined to try as many different hops as I could, and I apparently had little patience with that project. One beer that caught my attention was a Chzech Pilsner. I had just figured out that I could do a lager in the window space of my bedroom because it was winter. So, I found a recipe and trotted off to the LHBS to get my ingredients and my saaz hops. When I got there, I was dumbfounded to find that they had none at all. I was so confused—this was the noblest of noble hops and they didn’t have any! I called every week to see if the had come in, when the eventually had them in stock, they cost $4.50 an ounce! To put that in perspective, I could buy cascades now for $4.00 per two ounces. Right now, saaz costs only $5.50 for two ounces. I was joining the home brewing community late in one of the darker ages of craft beer and I had no idea. What in the world was going on?

In 2008, there was a hop shortage. There were not enough hops to go around. It was a similar situation to what we’re seeing now with ‘Goyf: an erroneously-printed card, tiny initial print run, Modern Masters creating demand for three more per one opened, the long run up to Modern PTQ season to allow for this inflation in such a visible and tangible fashion, and an explosion in player base. And a very similar thing happened with hops from the early 90s up to 2008.

Storming in Czechoslovakia

9785498175_7051a9784c_n

Starting in the early 90s, there was an incredible bumper crop of hops around the world. We reached an all-time high of hop acreage, coming close to 240,000 acres. At this time, the craft beer boom was only in its infancy, so the ever-growing demand for hops was only starting. Thus there was a surplus of hops on the market. Luckily, these hops were not wasted, as hops are easily turned into hop extract that can be stored for use at a later date. There was, however, such a surplus of hops at the time that the profitability of growing them was diminishing. Farmers did the intelligent thing and used their land to grow more profitable crops. After a long descent, the world hop acreage diminished to around 114,000 acres by 2006.

In 2007, Mother Nature got a little pissed off with the world and had her wrath. Here in Winnipeg, we had the flood of the century. The waters climbed to the highest they had been in over 100 years and forced thousands from their homes. Across the world in Czechoslovakia and Slovenia, the climate as well as an ice storm that hit just before the harvest season for hops, had the cumulative effect of bringing the countries’ harvests down by 30%. Along with only mediocre harvests from Germany and England, and the fact that the hop extract surplus had all but dried up, it was about time for a [card]Snapcaster Mage[/card]-style market correction.

What a Hop Shortage Looks Like

This is where my analogy breaks down a little bit. Hops are only good for one-time use. 8420446904_07e6532fd5_nYou can use a [card]Misty Rainforest[/card] 1,000,000 times, and so long as it has been sleeved, it will still have some life left in it. Cards are regularly being bought and sold as people get in and out of the game, but the supply never really runs out. Hops, on the other hand, are a little bit different. Hops are purchased on contract. This means that a brewery will purchase its hops at least one year in advance of them being produced. What this means to the LHBS and the really small microbreweries is that, if all the of the hops that were harvested have already been paid for, there are simply no hops available to buy. This is why when I wanted to make my own pilsner there was no saaz. It’s not like saaz were marked up to 20$ an ounce—no, there wasn’t any to purchase. No companies were coming in to sell their hops for a healthy profit, although I’m sure this happens at a higher level. The shop owner had to send email after email and make call after call to find someone who had a small stash of them that they were willing to let go of at whatever price. Many breweries had to formulate new beers depending on what hops they were able to get their hands on. It would not surprise me if I found out that some of the smaller breweries had to stop production altogether because they just couldn’t buy them.

Things turned around after the next harvest. Recovery was not immediate, but the market has a way a sorting itself out. Hop prices were high so there was lots of money to be made. Where there is lots of money to be made, there will be lots of people lining up to take advantage. There was at least one hop garden that opened up near Winnipeg due to the shortage. They now supply our microbrewery and our LHBS. Homebrewers can go out to the garden at the beginning of the season and buy pieces of the roots, called rhizomes, to grow their own hops. Adversity breeds opportunity, and so it has!

I would love to tell you that all is well now, five years later. But there is another phenomenon 7961645510_f132aef9c3_nthat is impacting the price of hops in a commandingly cryptic fashion. It’s a far happier problem though: the problem is that micro-breweries are opening at a rate of 1.6 per day across America. That is a lot of hops!

Alas, this is a story for another time.

 Style of the Week

The style of the week will obviously be double IPA!

This is the style that uses the most amount of hops possible. I recently listened to a podcast where the guest was responding to a question oft asked: “When should you add hops to your beer?” His reply? “Yes.”  Double IPAs will often boast well over 100 IBUs, even though the maximum solubility rate into beer is only about 104. But that’s okay—the more the better! I don’t need to say much other than it’s strong and hoppy! A well-balanced double IPA will not claw your face off with bitterness, but one with a more aggressive intent will indeed claw your face off with hops. Glorious! Here are the full tasting notes from the BJCP. Make sure to try and find a local version first. If you can’t, the most common styles you’ll find will be Dogfish Head 90-minute IPA, Rogue I2PA, Stone Ruination IPA, and Three Floyd’s Dreadnaught.

Thanks for hangin’, everyone!

Andrew

The Puzzle Box – Larger Inside than Out: Infinity Drafting

“Are you a restrictions-breeds-creativity kind of guy?”

This is the question that our dear community manager, Jason Alt, asked me when I was wondering about what he wanted for the site. The answer was yes, but actually I had no idea how strongly that answer applies. I know that there are people who live outside of restriction and can create, but honestly, I have no idea what that would look like. I am currently working on a post for my blog that discusses this topic exactly, except the whole thing is on it, rather than just a brief intro. The long and short of it: it is larger inside the box, than the box is large. Some smarter people than me quoted this very publicly, so I am going to try and get a little mileage out of it.

“Thanks for the nonsense bro, but what does this have to do with Cube?”

It has everything to do with Cube.

Today we are going to discuss how the idea of “restrictions breed creativity” affects how we use our cube. As I said in User’s Manual, chances are pretty good that you may not have very many people to cube with. I know that this is the case for me much of the time. And if you are anything else like me, which WotC’s data is going to presume you are, you may only have one or two people that can get together to play Magic on a regular basis outside of FNMs.

I have a confession to make. The majority of my cube drafting has been done with only one other person. Does that intro to this article make sense yet? My friend and I were getting a little tired of the disjointed decks that are created by conventional two-man Draft formats such as Winchester and Winston. I will do an article on these draft formats in the future, but I’d rather start with a format that gets your hands on your cube and lets you learn it really well, even with only two people. This goes double for the Puzzle Box, because it is much smaller than the average cube.

5202298324_ba788921c6_m

Infinity Drafting

The main points of this format are to make a lot of decisions, do a lot of drafting, build two decks per person, play for a long time, and create a metagame within the match.

It’s called the Infinity Draft because of the shape the packs trace when passing them from person to person. Now that I have got at least 50 of these drafts under my belt, it is also reflective of the infinite amount of time it takes to start and finish the draft. I love it!

Drafting Method

Each person starts with six fifteen-card boosters, three on the left and three on the right.

Each person picks up the first pack to their right and makes their first pick, this card goes into their Deck 1. Then the same on their left pack, this card goes into Deck 2. Each pick made on your right hand side goes into Deck 1, and each on the left goes into Deck 2.

draft_lens20101645module163903681photo_1355166118_

The first passing of the packs is called a “pass.” This means that the pack to your right goes directly across the table to what would be your opponents left. And same goes for your left pack.

pass

You then make your picks in the same order of right pack to left.

The second passing of the packs is called the “switch.” This is the part that makes sure that the packs actually rotate so each deck sees each pack in the correct order. How this works: your right pack goes diagonally across the table to what would be your opponent’s right, and the opposite goes for the left pack. Each person then makes their pick.

switch

After your next pick, the next pass is the “pass,” the one after that is the “switch,” and so on…

It is very very easy to forget if your last pass was a pass or a switch. We used to use a copy of switcheroo to keep track of which one we were on, but it just got forgotten about and created more confusion. A foolproof way of keeping track of it is simply to count your cards. If you have an odd number of cards, your next move is to pass. If you have an even number of cards, your next move is to switch. Simple as that!

While you’re drafting, just have one person fan their cards out so they can make a quick count. You’ll do this often, I promise.  For each new pack, set aside the previously drafted cards and have the person counting start a new fan. This seems an odd detail to dwell on, but mixing up orders of packs has been bad news. Rinse and repeat until you’ve drafted all the packs. Then, of course, you build your decks.

The Mini Meta

So now that each person has two decks, you have to decide which deck to play. Here is where the protection from drafting one super deck and using the other as a hate draft pile comes in. At a minimum, you should be playing best three of five, but the format is even better if you have time for best four of seven.

Note: Deck selection and usage rules are confusing at first. They become obvious after you’ve played the format a couple times. They are are very important.

Each person can choose to play either deck for the first game, or you can determine randomly. If you choose your deck, you must switch decks for game two. After game two, you can use whichever deck you choose. If you had your deck randomly decided, you may choose to continue playing that deck in game two, or you may switch to the other one if you want.

The balancing act of the meta works out as such: after two losses, the person who has lost twice may then choose which deck his or her opponent will play in the next game. He or she does not, however, get to know any extra information about the opponent’s decks than is already known.

Example: If the match goes 0-2, the person with two losses chooses his opponent’s next deck. If the 0-2 then wins, bringing it to game four, the same player may again choose his opponent’s deck. If it goes to game five, the player that just lost his second game most recently gets to pick his opponent’s deck. Keep in mind that it just has to be two losses, not two losses in a row. So if one person goes to 1-2, he then gets to pick the other person’s deck.

Here is where we often decide that we want to go best four of seven. This is usually because we just want to keep playing within a match atmosphere and there’s not enough time for another draft.

Good Times

I cannot tell you how much fun I have had playing this format! You get to touch twelve packs each time you cube. The decks end up being very cohesive, so you really get to see which archetypes are good in your cube and which ones need work. When you move from this to drafting in a normal fashion, the choices become much easier, because you only have to think of one deck, not two. This format honestly feels like you are learning to cube draft at three times the speed of a normal draft because you are doing double the amount in the same amount of time.

There’s a lot of thinking going on in this article, but if you work your way through all of it, I promise it will pay off!

Thanks for hangin’, everyone.

Andrew

P.S. Only one puzzle box change this month to bring it from $207 to $199

$8 Goblin Guide ——> $.50 Reckless Waif

Serum Visions: All-Grain Brewing

Hello, everyone, and welcome back to Serum Visions!

This has been a fun week for home brewing in the Colman house. I got to do some bottling of beer that has been in the fermenter for well over three months. It doesn’t take too long to bottle beer, but you need a friend to do it with you. Luckily, I got my friend Bryan to come over and give me a hand. We cracked one of my special beers for the evening’s drink: a barrel-aged Avery stout with 16.53 percent alcohol. Wow, it was an exquisite beer! I lucked out on my last trip to Denver by talking to the “beer guy” at the store I was at. After we talked for around 15 minutes he went to the back room and grabbed a few of the beers that they kept stowed awaythese were the special ones, saved for the right people.

Why am I telling you all of this? Because, these “beer guys” and “back rooms” are not all that uncommon. If you start really getting to know your beers and start understanding how everything is created, you’ll be able to engage in some real conversations with other beer nerds. If it so happens that one of these beer nerds works at a beer store, you might just get your hands on something really special. So I would like to encourage you to have some conversations at your craft beer store. You’ll find the people who work there will be more than happy to talk for hours about beer if they can get away with it.  You’re guaranteed to meet some awesome people and might make some new friends.

Now for today’s topic. We have arrived a the grand daddy of all home brewing techniques.

All-Grain Brewing

If you read the last installment of Serum Visions, you learned about most of the processes that go into turning malts into the sugars you need to make beer. The difference between a partial mash and all-grain is a fairly simple one. Instead of using malt extract to make up the bulk of your fermentable sugars, you are using  around 10 pounds of base malt, depending on what kind of beer you are making.

That seemingly small difference makes a huge difference in process. When you do a partial mash, you are usually only mashing a few pounds of grain to give the alcohol a little boost or adjust the fermentation characteristics of your beer. So if you were doing three pounds of grain, you would need to heat about a gallon of water. This you can do on the stove top in about 10 minutes, depending on its power. If you were to make an IPA at around 6.5%, you’ll be using around 12 pounds of base malt and at least a couple pounds of specialty malt to give it some character. This brings your total grain weight up to around 14 pounds, and now you are talking about 4.6 gallons of water to bring up to a boil. If you think about the water cooler at work, that holds 5 gallons. Imagine trying to bring that up to a boil on your stove top.  But not only that, you need to run some extra water or sparge water over your grains to make up the rest of the boil volume. If you are doing an hour boil, you need to account for the amount of evaporation that is going to happen during that time. This varies greatly for each person’s setup, but it is not uncommon to need 8.5 gallons of water for an hour-long boil. As you can imagine, needing to boil 8.5 gallons of water for an hour will require a massive pot and a lot of heating power.

Just for fun, we are going to look at a few different all-grain brew setups to see how impressive they can be.

Start Simple

IMG_0308

This first one is a fairly simple setup. You can see by the general lack of electronics that it is all gravity fed. On the top tier you will see the hot liquor tank (HLT). This is simply the vessel that holds the water while you get it up to its strike temperature. If you look closely, you’ll be able to see the flame coming up from underneath the HLT and the thermometer on the side of the pot. Once the thermometer gets to its strike temperature, probably around 174 degrees, the brewer releases the hot water into the cooler set up on the second tier down. The cooler will hold the grist (milled grains) and the hot liquor for an hour for the mash. After the mash is complete, the brewer will release the ball valve on the bottom of the cooler to release the wert into the boil kettle. The boil kettle is the on the third tier down. If you look on the floor underneath the boil kettle, you’ll see a propane tank that will fuel the hour boil.

Level Up

IMG_3194

This setup is one of the more common ones for an all-grain brewer. It is made of three full-sized kegs on a welded steel structure. The liquid is moved from the HLT to the mash tun to the boil kettle using a series of pumps (rather than using gravity). You can see that there is a burner situated under each of the kegs. In this picture, we do not see the propane tank, but this method too is propane powered. If you look at the top of the right keg, or the boil kettle, you’ll see two copper tubes sticking out the top. This is the wort chiller. This is made up of soft copper tubing that has been coiled to fit the size of one’s boil kettle. The input end of the wert chiller hooks up to a cold water source and the output end runs down a drain or into another storage vessel. After the boil has finished, you turn on the cold water and it runs into the input end and out the output end. It comes out at around the same temperature of the wert so you know when it is cool enough to move to your fermentation vessel.

Almost There

IMG_3387

This next one is “the cat’s ass”—it got that name from a beer judgeit is an TheElectricBrewery.com set up. There is no propane burning in this set up. Everything is electric, and there is an element inside of each of the pots. Those elements are controlled by that fancy-schmancy panel over there on the wall. All of the temperatures are set into the panel. There is a PID controller (proportional-integral-derivative) in each of the pots, which provides the panel with constant readings so that it can adjust the power going to the element to keep the water at precisely the right temperature. These setups can be hooked up to your computer so you can monitor the progress of your brew from another room, or record it for analysis at a later date. They can even be put on a timer, so if you want your brew day to end early in the afternoon, but don’t want to get up that early in the morning to get the HTL heating, it will wake up and turn itself on for you. You can see that this is probably in someone’s basement, so he or she has a full ventilation system to catch the steam and send it out into the world.

And We Got There

This, however, is not as cool as it gets. It is, I might guess, as efficient, convenient, and expensive as it gets, but it is not as cool as it gets. At brewingasart.wordpress.com, we find the coolest of the cool. Real live steampunk. I don’t think we should let the clever pun escape usthere is a lot of steam created in the process of brewing. I wont prattle on about how this one works. It makes beer, and it does so elegantly, stylishly, and commandingly. Go to the website and look at the photo gallery to see it in all of its steampunky glory!

109

It seems that I have been slacking in my assignments of style of the week, so I’ll pick the practice up here. This week’s style will be 19c, the American barley wine. Why? Because it will have the most amount of grains for our all-grain article. It is going to be strong, malty, and noticeably bitter, starting at around 8% and going up to 12%, according to the BJCP style guide. This is the highest percentage alcohol beerdue to the amount of grainsother than the eisbeer, which we already covered in a previous article. You can find the full tasting notes here. The commercial examples you’re most likely to find are Sierra Nevada Bigfoot and Anchor Old Foghorn. Make sure to look for a local version first, of course.

There is much more to know about all-grain brewing, so if you are interested, pick up Charlie Papzian’s book, The Complete Joy of Home Brewing, to get all of the real details.

And as always, thank for hangin’.

Andrew

The Puzzle Box: User’s Manual

Hello, everyone, and welcome back to the Puzzle Box!

I have been showered with compliments these last few weeks since my final reflections on our little project were published. Maybe showered is a bit strong of a word, but it is certainly how I feel. People have been asking about the process of building the Puzzle Box and there could be no larger compliment paid. But as for the nature of my column and the ever-rising level of readership on this website, articles that are in the archive are all but lost. This is the internet of course, and this is largely a Magic finance website where articles may be outdated before they are published.

I feel grateful that this column is only slightly susceptible to the sustained uptick of the Magic market wrath. All of this is to say that some people who are reading this now may not have been here when this party started, and therefore may not have the clearest concept of what this column aimed to do. I’ll add a link to this article to my ever-lengthening signature at the bottom of all of my future articles.  I’ll be repeating some of the things from the whole of this series with intent of this being a timeless summary of the project that will explain its concept, purpose, and method.

The comment that was posed to me a few times these last two weeks was this: when all of these cards were added to a shopping cart for any given card retailer, the total value was well over $200. This is something I had known was going to happen almost from the beginning of the project.

I originally took a vote on how much people would like this list to cost, and the result was $200. At the time, I was skeptical if this was even possible. I established then that this was going to be a theoretical $200, based on the TCGplayer shop optimizer’s final cart total. I also chose not to take shipping into consideration.The point of this list is to give everyone an idea of which cards you should be looking to pick up as the best value and the cards you should target as thow-ins. For example, if you had an option to trade for a [card]Giselbrand[/card] at $23 or five other cards of the same value, if you were trading with the intent of building this list, then the five cards would hold greater value for you in the trade. It will also help when you pass the collection plate around to your friends to know which cards are worthless or worth less than 15 cents on TCGplayer.

I started off by breaking the mold a little bit—360 cards seems to the the smallest build considered by most managers. This is because 360 cards is how many you need to support an eight-man draft. A few things led me to think that a 360-card “budget” cube—I really dislike that word, I prefer “starter”—cube is excessive for a few reasons.

Chances are that someone who is concerned with budget while trying to build a cube probably does not have eight people to draft with right away. If one proceeds prudently, he or she ought to be able to produce this list for its projected price. Furthermore, the chances are pretty good that one may not even have a regular play group of six, so the size of this list will still produce a little variance. If you are a person with eight people to draft with on a regular basis and the budget aspect is still of paramount importance, I apologize. But if you are like I was when I started cubing, you probably only have two people to draft with. To help out, I’ll show you an awesome two-man Draft format in the near future.

If, in fact, one does have a full pod to draft with, then the budget aspect is likely to be less of an issue. Someone with an eight-person playgroup likely already has a good amount of cards, so this list will probably cost much less than $200 to put together. More people in a playgroup means more opportunities to accept donations of more common cards, too. If you do have eight people in your group, you’ll need to start looking into expanding this list. Cubetutor.com is a great place to start.

There is no way that one could add this entire list to the shopping cart for a single retail store and get it all for $200. Each common would be at least 25 cents, and some of the pricier cards will blow the budget out of the water. Another caveat to the pricing of this list was that I was just as happy picking up a white-bordered, heavily-played, nasty-arted, and poorly-altered version of a card as I was getting the crimped, foil, miscut, baddest-of-the-bad version of it. As a little aside, I still run a white-bordered Fourth Edition [card]Llanowar Elves[/card] because it’s such an easy card to get a decent copy of that I want my copy to be rubbish or exactly the one I want. No compromise of the [card]Llanowar Elves[/card]!

I just added the whole list to the TCGplayer cart optimizer to find that the final total came to $212.68. Once a month, I’ll go ahead and check where the value is, adding and removing cards as appropriate. In the last Puzzle Box, I recklessly cut all of the jankiest cards in the list. I then hastily replaced them with strict upgrades for their slots. Riddle me this: which is the first card to get swapped back?

Right, I hope that this makes clear what this project’s goals are, and how to go about accomplishing them. If you have any more questions or critiques, you can find me here in the comment section—I always try to reply. Or you’ll catch me for sure on Twitter @awcolman.

As always, thanks for hangin’.

Andrew

http://cubetutor.com/viewcube/5381

P.S.

Here you’ll find the list of cards that were in the list at one point but were moved to the on deck binder for one reason or another.

Here is a link to the article importance of an on deck binder found here.

And the other great cube resources

http://eckamon.blogspot.ca/ – The Magic Box with TSG and Kyle Eck

http://idratherbecubing.wordpress.com/ – The Third Power with Usman Jamil and Anthony Avitollo


Serum Vision: Brewing Methods 201

Hello, everyone, and welcome back to Serum Visions!

Last week we took a look at some introductory methods of making beer: the can, the kit, and the steep. If anyone has taken a shot at making their own beer—whether through inspiration from this series or as long-time home brewer—leave me a message in the comment section. I’d love to hear what you’ve done so far.

This week, I was planning on going over a few methods of making beer, but I ended up only being able to cover one: the partial mash. This works out well because it covers much of the information I’ll be referring to while talking about all-grain brewing next time. All-grain brewing can be a real spectacle! When you go all the way, you end up with what is called a brew sculpture. It’s a beautiful thing and it deserves its own article. But today we will talk about the beginning of my adventure…


The Partial Mash

The next step up from the steep method we went over last week is the partial mash. This was the first beer I ever made. After I learned the full scope of how disastrous home brewing could be, I took a step back, did a lot of reading, and made a few steep batches before diving back into partial mashing. These days, because I am working in a much smaller space (in an apartment and not my parent’s kitchen), I switch back and forth between steep and partial-mash beers. They both make a very good product. Which method I choose depends on how ambitious I am feeling, or whether I am teaching someone a certain method.

To understand what a partial mash is, you need to understand that all of the grains used to make beer have been mashed at some point.  When you make a partial-mash beer, you are extracting a portion of the total sugar that will be turned into alcohol from malted grains. The other portion comes from malt extract.

A Couple Terms

Mash: the process where your grains soak in hot water to convert their starches to fermentable sugars. The sugars absorb into the water to create wert.

Malt Extract: Wert that comes off of mashed grains and has been boiled down to a very high sugar concentration, thus becoming liquid malt extract (LME). It can be boiled down to the point where it becomes a solid and processed to be a powder. This is called dry malt extract (DME).

Strike Temperature: This is the temperature of the water before you add your grist, or milled grains. It takes into consideration the temperature difference between the grains and the water to ensure that when the grains are added to the water, their temperature equalizes to your exact mash temperature. This temperature needs to be very precise.

Various Ways One Could Skin this Cat

The Stovetop Mash

One way of doing a partial mash is in your boil kettle, most likely a pot. You start by adding the proper amount of water to your pot, around 1 1/3 pints (or 630 ml) per pound of grain, and bring it up to your strike temperature. You then mash in—slowly add your grains to the hot water—and make sure you hit your mash temperature. If it’s too hot, add some ice. Too cold? Turn up the heat for a minute. If you are doing a stovetop mash you would need to keep a very close eye on the temperature with a thermometer, making sure the temperature does not fluctuate more than a couple degrees. If this sounds like a serious pain in the ass, you’re right. If you are doing it this way, which I did for a long time, you’ll need to raise the heat on the element if it dips below your mash temperature and take it off the element if it rises above it.

The Mini-Mashtun

Another option is to get a picnic cooler with a spigot on the bottom. The idea here is that you add your grains and hot water to the cooler and they balance out to their mash temperature. When you put the lid on, the insulation of the cooler keeps the temperature with no fuss.  A few modifications do need to be made to the cooler, however. You need to either add a false bottom and drain with the spigot, or rig up some sort of straining system. I use a brand new stainless steel plumbing braid with the rubber hose removed, clamped to a small copper pipe that fits through a rubber stopper. Place the stopper in the spigot hole from the inside, then add a piece of hose to the external piece of the pipe with a hose clamp to keep the water from spilling everywhere. An example of a ball-valve version of this setup can be found here.  If you like to jimmy rig things to serve unintended purposes, like [card]Keen Sense[/card], guttersnipe and fossil find, you are going to love being a home brewer!

The Hybrid

Quick aside: I’d be curious what images come to your mind when you think of a stovetop picnic cooler method. Leave a comment?

In the spirit of jimmy rigging things, you can come up with any number of ways of getting your mash done. Sometimes my mini-mashtun has been too small for the amount of grains I wanted to mash. In this case, I’ve used a hybrid stovetop-cooler method. Let’s call it the insulated-pot method. I’ve had great success putting my pot in a box that has been lined with towels after achieving mash temp on the stove top. This is as about as hack as you can imagine, but in the end it made beer, and it was good!

The Sparge

After you’ve mashed for the hour, you strain your wert and move into sparging. This is a fancy word that means rinsing off the remaining sugar that has stuck from the grains. It would be a rather unfortunate event if any of the very-fermentable dextrose (VFD), the sugar that comes from corn, were left on the mashed grains. There are many methods available for sparging which we won’t discuss here. Simply stated, you heat your water up to 170 degrees and pass it over your grains to extract the last bits of VFD and other sugars, then add that to your other wert before the boil. From here, you continue on as you would as if you were doing a steep, where you boil until you reach your 15 minute mark. Then take the pot of the stove, add the malt extract, and stir until it’s dissolved. Finally, bring it back up to a boil, boil for another 15 minutes, and cool.

This may seem like a lot of extra work to come to the same result of drinking homemade beer. But as I stated in my previous article, you are able to exact a far greater amount of control over your beer this way. For instance, there are a multitude of different base malts, all of which have distinct characteristics. If you are steeping and using malt extract, you will only get the character of the specialty grains you are using and whatever base malt was used to make the extract. Again, this will make good beer, it just wont be very precise. If you wanted to make a beer with exactly 4% alcohol but you wanted to use some corn to lighten the flavor, you’d need to mash it to get that result. Another reason may have to do with the fact that the temperature at which you mash your grains plays a massive part in how your beer will turn out. If you want a sweeter beer, you need to mash at a slightly higher temperature. A dryer beer requires mashing at a slightly lower temperature. None of these ends can be achieved by steeping and adding malt extract alone. Furthermore, unless you are doing an all-grain batch, where you mash for 100% of the fermentable sugar, you will not get exactly the result you are looking for if it is outside the spectrum of the malt extract’s fermentability.

I don’t want to promise too much for next time because it may turn out that going over the brew-in-a-bag process takes an entire article as well. So instead I’ll say coming soon to a Magic finance website near you: brew in a bag, all grain, and the Tassimo of home brewing!

As always everyone, thanks for hangin’.

Andrew

P.S. Go make your own beer!

The Puzzle Box: Reflections and Updates

Hello, everyone! Welcome back to the Puzzle Box.

Today, we’ll be reflecting on the past couple months. When this whole thing 
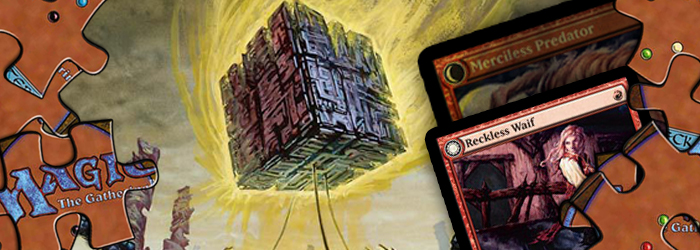
got started, I actually had no idea what I was doing and how good this cube would look  in the end. I was afraid that this thing could be a catastrophic failure and my writing career would be over before it even started. Well, that didn’t happen. It turned out fairly well. We came up with a list that looks respectable, very fun to play, and came in well under $200 on TCGplayer. It actually came in at $182 the first time I checked. When I refreshed the list a few days later, it came to $160, and still another day later it dropped a further $14 to $146. This leaves me throughly confused.

The fact is, I scrapped for every dollar in each section in an attempt to keep them under the $25 mark. Occasionally I fudged a section by a dollar in hopes that I could save it somewhere else, which I did in the multicolored section.  But after all of this scrutinizing and penny pinching, it ended up amounting to less than 75% of the original goal!

Moving Forward

Now the question is: where do we go from here? One thing I’ll be doing for sure is a monthly update of the list. We don’t get to do spoiler season like the rest of the cube community. For instance, I’ve already got my [card]Brimaz, King of Oreskos[/card] preordered. I think $25 is pretty good and the card will be going up from there. This, however, is not really an option for this list. We’ll have to wait for things to settle before we get to do our updates. The most exciting time for us will be rotation, when Standard all-stars become Modern durdles and prices tank. Here’s lookin’ at you, [card]Thragtusk[/card]! In the second Puzzle Box article of each month, I will revisit the existing list and replace cards that have become too expensive or add cards that have become less so.

I am resolved to keep the list at 270 cards, because moving it up to 360 would dilute the high quality concentration. In the next update, I will bring the list up to the original $200. This means that there will be some significant changes, but fear not! When you are building a cube, the first thing you’ll learn is that its first iteration will last only about as long as your pack one, pick one. I had this silly idea that when this cube was built it would cease to act like a cube. But a cube is a dynamic thing, and one based on a price ceiling is especially so. (Keep in mind that I still maintain that this is a starter list and once built I recommend adding to it and expanding to fit your budget and playgroup.)

Know Your Resources

If you are interested in being a cube manager and would like some good resources to dig into, I heartily recommend going and listening to all of the back episodes of the podcast The Third Power. Its hosts are Usman Jamil, @UsmanTheRad , who writes on Cube for Star City Games, and Anthony Avitollo, @antknee42, who writes on Cube for Gathering Magic and Legit MTG.  Even though they haven’t come out with an episode in a while, all of the the topics they covered during their heyday run of episodes are a very valuable tool to a new cube manager.

I bring this up because they did a podcast on the importance of an on-deck binder. This is a binder where you hold cards in a kind of a purgatory. These are the cards that you want to test but haven’t decided what to cut, or the cards that you have cut but don’t want to lose because they may be back one day in a future update. I can imagine such a binder for the Puzzle Box bulking up very fast, especially if the total price keeps fluctuating the way it has been. I will keep a running list of all of the cards that have gone in and out of the 270 cards. This will make it easy for anyone who comes to this series, finds they have most of the cards in the current list, and wants to expand it right away.  Cards like [card]Archon Vengeful[/card] and [card]Black Vise[/card], which have already been replaced by far more cube-worthy cards like [card]Angel of Serenity[/card] and [card]Cursed Scroll[/card], will not be added to the on-deck binder. If we have $56 of extra money, there is no good reason for them to be around. This week, however, I am only going to swap out the few cards in the list that have strict upgrades. Then we’ll wait and see how the price settles.

Tristan Sean Gregson, better known as TSG, gave the Puzzle Box some serious praise on the Heavy Meta podcast last week. Here’s a shout out to say a huge thanks to TSG and the guys on Heavy Meta for bringing this project such great attention! You should check out The Magic Box podcast and stream.  I have watched all of the Magic Box episodes and have learned much from the two cube masters that glow by screen-light: Kyle Eck, @youngmecca, and TSG, @TristanGregson. I plan to go deep on some of these episodes in future articles, because they are a serious wealth of information.

Wrapping Up

I did promise the Google Doc spread sheet that would help with keeping the ratios of the cards consistent as you added cards. Unfortunately, I am not the most proficient with Google spreadsheets so it is taking me a little bit longer to get it as customizable as I would like it to be. If anyone is a whiz with these things, I would greatly appreciate some help. You can catch me on Twitter, @awcolman, or leave a comment and we’ll sort something out.

As a good Canadian, I must extend an apology for the hodgepodgeyness of this article. There were a bunch of things I felt like I needed to cover: further resources, the budget and updating goals of this list moving forward, and the importance of an on-deck binder. This should set you up quite well to get on with managing and customizing your cube!

Alright, that’s all for this week. As always, thanks for hangin’, everyone!

Andrew

http://cubetutor.com/viewcube/5381

Changes

[card]Black Vise[/card] —>[card]Cursed Scroll[/card]

[card]Vengeful Archon[/card] —> [card]Angel of Serenity[/card]

[card]Sphinx of Jwar Isle [/card]—> [card]Aetherling[/card]

[card]Shrine of Loyal Legions[/card] —> [card]Entreat the Angels[/card]

[card]Massacre Wurm[/card] —> [card]Grave Titan[/card]

[card]Reckless Waif[/card] —> [card]Goblin Guide[/card]

Serum Visions: Brewing Methods 101

Welcome back to Serum Visions, everyone!

These last couple of weeks have been spoiler season for us. As far as Cube goes, it’s been fairly slow going. [card]Brimaz, King of Oreskos[/card] is a snap auto-include in a cube of any size. Sadly for the Puzzle Box, it’s a bit out of our price range. [card]Courser of Kruphix[/card] seems pretty good, and after the presale prices have receded to their normal levels, I think it’s got a pretty good shot at getting into the Puzzle Box list.

However, we are not here to talk about Cube, but rather, beer. As I said in the introduction article to this series, I’ll be trying to take inspiration from the community for these articles. There is no spoiler season in the beer world…yet. But what this makes me think of is how excited the brewers of the MTG world get over new cards.  These brewers get to look at all 13,000 existing cards in light of the new ones day by day. This led me to the think about how brewers of beer and decks alike have individual methods which they can apply to later brews or new cards.

It was this fundamental method that inspired me. We all have our way of setting things up and getting to the brewing process. It is a lens that we have that we see all things through. Some things will work for one person and not for another because our lenses are all different. For many home brewers, that lens is often our setup, how we actually make the beer, and what kind we like. For instance, if a home brewer has a temperature-regulated freezer, he then looks at ingredients as having the possibility of being a lager. Those without that equipment simply can’t brew that type of beer. A home brewer who makes his beer as strictly a cost-saving method will view a $13 packet of wet yeast as strictly worse than a $2 packet of dry yeast. On the contrary, for someone like myself, who is not really concerned about drinking a lot of beer, but instead enjoys the adventure of tasting and trying new things, that $13 packet of yeast looks pretty damn good.

But where we all need to start is with method. How do we actually make the beer? I’m going to try and help you to figure out, if you don’t already know, which type of brewing method is right for you.

Each process I’m going to describe is a clear level up from the one previous. From can to kit, the quality of the beer increases dramatically. From kit to steep, the variation levels up drastically. From steep to partial mash, the complexity takes a giant leap forward. And from partial mash to all grain, the process, control, and complexity are increased tenfold. With each level, the quality of the beer get better. However, it is necessary to note that it is not unheard of for a partial mash or even a steeped beer to win competitions. It’s not as common (for a multitude of reasons), but it is very possible! Keep that in mind when you are trying to figure out how to start making your own beer.

The Methods

Can

This method is one step forward, two steps back. And since this is step one, you end up in the negative. I would suggest just skipping this step. But for the sake of completion, I will not ignore it. What you do is crack a can of hopped malt extract and add it to a carboy. You then add a few pounds of white sugar to get your desired alcohol content and top up with water and pitch the yeast.  The one step forward is that you actually are required to add something extra, other than water, to your carboy before you pitch the yeast. If you choose to go this route, make sure the sugar you add has been boiled for 15 minutes and cooled before you add it to the carboy. There may be some nasties (technical term for bacteria that can cause an infection) in the bag of sugar. The two steps back comes with the fact that this beer is terrible! I could go on a bit of a rant about this, but I’ll contain myself. But if you’re curious, hit me up on Twitter @awcolman and we’ll get this party started!

Kit

This is the most simple of all methods of making beer.  It is basically the same as making wine. You buy a large box full of highly concentrated wert, put it into a carboy, and top the carboy off with water. Add your yeast, which will be provided with the kit, and let it ferment. Bottle it up, wait a few weeks, and consume.

This is a really great way to get started. You get pretty good beer at the end of the process and you get to learn the flow of how fermentation and bottling works. If you have never made your own wine or beer I recommend you start here.

Steep

Here we have arrived to what I would call home brewing. Up until this point, we have  been making beer at home. As I said, I think you should start with a kit, so my intent is not to demean that method. But with the steep method, you actually get to start adjusting what your beer is going to taste like, thus making it your own.

This is also the first time we get to talk about setup. Up until now, we have only needed a funnel, carboy, and a separate vessel from which to bottle.

Using the steep method, you are going to need a pot and a heat source, probably a stove element, but there are other options. Armed with this pot and heat source, you are game to start making some really awesome beer!

How this method works: take your specialty grains (refer to my article Grain to Glass if you need some help with the jargon) and you add them to a pot that is full of cold water. You can either have them in a mesh bag or add them straight to the water and strain them out later. You then turn on the heat and remove the grains when the heat reaches 170 degrees Fahrenheit. Let the pot get up to a boil, then start your timer for 60 minutes. During this time, add your hops according to your hop schedule. At the 15-minute mark, add your malt extract after you have taken the pot off of the element (so you don’t scorch the extract). Bring the pot back up to a boil for another fifteen minutes. Once this is done, you need to cool the beer off as fast as possible. This may take up to an hour.  Once the beer has cooled to the right temperature, add the wert to the carboy and top it up with water. Pitch the yeast and proceed as normal.

You will most likely be making a five-gallon batch of beer but if you are using this method you probably do not have a five-gallon boil kettle. When we are talking about pots, size matters. You are going to want the biggest one your stove can accommodate. I live in an apartment with an apartment-sized stove, but luckily for me, the large element is pretty powerful. It takes about forty-five minutes for my three-gallon pot to come to a boil. This is a decent sized pot for doing stove-top brewing. If you need to go smaller, I would not go below two gallons because you’re going to be adding around two liters of malt extract at the end of the boil. It will boil over and make a huge mess if you don’t have ample head space in the pot. Also, the high concentration of sugar at the end of the boil will inhibit the hops from imparting their full character.

Until Next Time

In the next installment of Serum Visions, I’ll cover partial mash, which will include both the cooler and the brew in a bag (BIAB) method. I’ll also discuss all grain brewing in its many forms. Also, we’ll look at a new invention that functions kind of like the Keugrig or Tassimo of the beer world.

I would say that if you want to start brewing, you are now armed with enough information to get started. Pick one of these two methods—the can doesn’t count—and find your Local Home Brew Shop (LHBS) and tell them what kind of beer you want to make and the method you want to use—they will take it from there! You may also want to pick up Charlie Papazian’s book The Complete Joy of Home Brewing to get a more detailed look at what is going on.  Start with one of these methods. Don’t wait for the next article, just go do it now! If you choose the right style and plan properly, you can even be ready to bottle by the time the next Serum Visions is published.
As always everyone, thanks for hangin’. And go make your own beer!

Andrew

Puzzle Box – The Final Golden Reveal

Hello everyone, and welcome to the Puzzle Box!

Here we are. This is it! This is the mutli-colored section of the cube, and it’s the last section to be posted. After today, anyone can come to this website and find a powerful and balanced cube for under $200. This is exciting! I’m just going to dig right in because there’s lot’s to be said this week.

General Notes on the Gold Section of the Puzzle Box

In this cube, the largest and most detrimental omission due to the financial constraints is the mana base. That being said, just because you don’t have all of the very expensive lands does not mean you won’t have a lot of fun playing this list. When I started building my own cube, I had only a few of the M10 check lands and ten [Card]Terramorphic Expanse[/Card]s as fixing—and it was an absolute blast to play. Why is that? Because you are going to build the best decks you can, they will be at balanced power levels, blowouts won’t happen, and games will just be fun. I would, however, recommend that the mana base is the first place you put any real money into this list. If you don’t already have the ten shocks, you can start by getting the M10 check lands as they are quite inexpensive. However you feel like acquiring the lands for cube is up to you. One thing I would suggest, though, is that you add them in cycles to keep things balanced.

Regarding the dual lands, and mana rocks for that matter, in our list I chose the best lands and mana artifacts within our price restrictions. Each archetype got one dual land and one mana rock—which one depended on the focus of the archetype.

Control and midrange decks such as Dimir, Azorius, Selesnya, Orzhov, Golgari, Simic, and Izzet got the Ravnica bounce land and its signet. Rakdos was the only guild to get its pain land and Mirrodin talisman. Gruul and Boros each got its corresponding pain land and signet. These two guilds are good for aggro but also for [card]Wildfire[/card] deck. The pain land gives each deck the option for a turn-one [Card]Goblin Guide[/Card] and a mana rock aids in breaking the symmetry of [Card]Wildfire[/Card] and [Card]Armageddon[/Card].

I think it’s interesting how things ended up balancing out. You’ll find that the signets will be very high picks in this cube because of the general lack of fixing. What this might mean is that aggro decks will be happy to main deck a [Card]Pillage[/Card] or [Card]Disenchant[/Card],  because it could very well blow out an opponent that is relying on signets for fixing. I walked in late at my LGS one night and there was a six-man team cube draft going on. Two team members were looking at a decks and a comment was made that the deck just died to a [Card]Stone Rain[/Card] because the mana base was so greedy. In our case, we don’t run [Card]Stone Rain[/card], as there aren’t that many targets for it (compared to a normal cube). For this list, where the concentration of mana-fixing artifacts is very high, that comment translates rather well to [Card]Disenchant[/Card].

Lets look at the lists.

Azorius

These colors are firmly rooted in control. There won’t be much opportunity for a U/W tempo deck because we’re missing cards like [Card]Geist of Saint Traft[/Card], [Card]Delver of Secrets[/Card], [Card]True-Name Nemesis[/Card], and [Card]Master of Waves[/Card]. If you have these and would like to push blue tempo rather than control, that’s a good place to start.

[deck title=Azorius]
[Cards]
Azorius Chancery
Judge’s Familiar
Azorius Signet
Azorius Charm
Plumeveil
[/Cards]
[/deck]

Dimir

Dimir’s cards are a little more flexible. [Card]Psychatog[/Card] and [Card]Shadowmage Infiltrator[/Card] are good cards to have in both U/B tempo or U/B control decks. This is a better color combination for tempo than U/W, mainly because there is so much instant-speed removal and more removal attached to creatures.

[deck title=Dimir]
[Cards]
Dimir Aqueduct
Dimir Signet
Far // Away
Psychatog
Shadowmage Infiltrator
[/Cards]
[/deck]

Rakdos

Rakdos in this list is pure aggro, mainly made up of above-curve one- and two-drops and unconditional removal. Fixing that is immediate and causes yourself damage: what more could you want? An obvious exclusion is [Card]Murderous Redcap[/Card]. Add it if you’d like, but I wanted to keep this section as focused on aggro as possible due to the fixing that we have available to us.

[deck title=Rakdos]
[Cards]
Sulfurous Springs
Rakdos Cackler
Spike Jester
Talisman of Indulgence
Terminate
[/Cards]
[/deck]

Gruul

Gruul is a bit of a mashup in this list. It has two one-drops and a [card]Bloodbraid Elf[/card]. I included the two one-drops to help out aggro decks and [Card]Bloodbraid Elf[/Card] because it’s a card I am extremely happy to have in my deck all the time! If you don’t like this section, there is certainly room for innovation here. Have at it!

[deck title=Gruul]
[Cards]
Kird Ape
Tattermunge Maniac
Bloodbraid Elf
Gruul Signet
Karplusan Forest
[/Cards]
[/deck]

Selesnya

Selesnya is by far the deepest guild as far as the quantity of quality cards. Luckily for us, [Card]Kitchen Finks[/Card] was just reprinted and can be found fairly inexpensively. However, when Modern season hits, this may need to be adjusted as it could break our budget depending on if Reddit decides to buy it out.

[deck title=Selesnya]
[Cards]
Selesnya Sanctuary
Dryad Militant
Qasali Pridemage
Selesnya Signet
Kitchen Finks
[/Cards]
[/deck]

Orzhov

I really like this selection of cards. [Card]Lingering Souls[/Card] is very powerful and has thankfully been reprinted enough times to allow for its inclusion. I find [Card]Tidehollow Sculler[/Card] to be a very fun and powerful card to play.  [Card]Mortify[/Card] is awesome removal with a sometimes-relevant second option. If I know that my opponent has a [Card]Curse of the Shallow Graves[/Card], I’m going to be happy this kills it!

[deck title=Orzhov]
[Cards]
Orzhov Basilica
Tidehollow Sculler
Orzhov Signet
Mortify
Lingering Souls
[/Cards]
[/deck]

Golgari

This is an interesting section. In most lists, it includes removal spells and more removal spells, such as [Card]Abrupt Decay[/Card], [Card]Pernicious Deed[/Card], [Card]Putrefy[/Card], [Card]Maelstrom Pulse[/Card], and [Card]Vraska the Unseen[/Card]. We can afford none of these, so we get to include all the fun creatures that other cubes don’t get to include! As Mark Rosewater always says, “Restriction breeds creativity,” and being creative is always more fun.

[deck title=Golgari]
[Cards]
Golgari Rot Farm
Lotleth Troll
Putrid Leech
Golgari Signet
Dreg Mangler
[/Cards]
[/deck]

Simic

Simic is great because it lends us one of the very few combat tricks in the cube: [Card]Snakeform[/Card]! Again, because of our monetary restrictions, we are going to need to include some cards that are not as good, but may end up being more fun. So are they truly not as good, even when more fun? Only you can say.

[deck title=Simic]
[Cards]
Simic Growth Chamber
Simic Signet
Trygon Predator
Snakeform
Mystic Snake
[/Cards]
[/deck]

Izzet

Izzet is the most shallow of our guilds. The one staple that we have in this guild is [Card]Ral Zarek[/Card], but he doesn’t make or break the section. Again, here we have room for innovation. If you would like to push U/x tempo you could add [Card]Frostburn Weird[/Card] here. Use your imagination and see if you can come up with some fun things to include.

[deck title=Izzet]
[Cards]
Izzet Boilerworks
Izzet Signet
Fire // Ice
Izzet Charm
Prophetic Bolt[/Cards]
[/deck]

Boros

Here we have the home of aggro: one-drops and some burn spells. I would have included the Mirrodin talisman had it existed to help out aggro further. But I’m not sad to include the signet instead, because we have [Card]Wildfire[/Card] in the red section.  Not much else to be said here other than if you have an [Card]Ajani Vengent[/Card], you should get that guy in here because he is a pack one, pick one all day long!

[deck title=Boros]
[Cards]
Battlefield Forge
Figure of Destiny
Boros Signet
Boros Charm
Lightning Helix
[/Cards]
[/deck]

And So It Has All Come Together

Everything about cube can be debated. I invite that debate in the comment section. Considering that I have $8 left from the $200 budget, you could easily call me out for not including cards like [Card]Murderous Redcap[/Card]. However, I made sure each section got at least one or two of its non-budget inclusions and kept things at their lowest cost which I felt was in the spirit of this list.

Here I have included the link to this list on cube tutor so you can see it in its fullness.


I will be back next week to wrap up and reflect on this project and talk about some plans going forward. If you have any ideas of what you would like to see, please share them in the comment section. Or if you’ve been building this list as we have been going along, (and I know there is at least one or two of you), I would love to hear about it in the comment section. Or you can hit me up on Twitter @awcolman.


As always everyone, thanks for hangin’.


Andrew

Andrew Colman – Serum Visions: Sphinx’s Brew-velation

Hello and welcome to Serum Visions everyone


It’s been a quiet week in the MTG world it seems. Or maybe I haven’t been paying any attention. I was stretching to come up with a topic that was related to the MTG world and my wife recommend to “just give them a good old history lesson.” I though that was a great idea but it needed to be inspired. I wandered over to the Mother Ship (Daily MTG) and there it was, [card]Black Lotus[/card], as the Card of the Day. That’s the hallmark beginning of the impressive history of our game.

The earliest beer has been a topic of beer scholars for around hundred years. They have found more than 800 paintings on the walls of the pyramids and had temples dedicated to the goddess beer. Home brewing was an everyday occurrence, and existed as sustenance for the people of the time. There were also major breweries alongside microbreweries. There were different styles, ingredients, and regions. So let’s dig in to some fun stuff.

The Gods and Goddess of Beer

As I think we can all remember from elementary school, Egyptians life revolved around the culture’s gods and the 
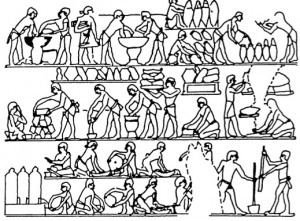
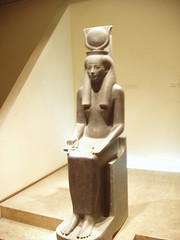
stories that surrounded them. Beer was no exception to this rule. It was believed that Dionysus was the inventor of beer. There is a somewhat contradictory story that reads that Dionysus actually fled to Mesopotamia because he was disgusted that the Egyptians enjoyed beer. Take from this what you will, it’s all here to say that the gods and beer were linked right from the beginning. If, however, Dionysus invented beer and somehow humans got a hold of it, we would need to be able to produce more of it. Since we are not gods who can just create things from nothing, we needed a process of making it: brewing. With that process came the goddess Hathor (see statue). She was the “inventress of brewing.” Another name that she carried was “the mistress of intoxication.” The temple that was dedicated to her was aptly named “the place of drunkenness.”  We then have another goddess associated with beer, her name is Menqet. She was often seen with Hathor and carried the name “the goddess who makes beer” and also “overseer of the brewery women.”

The Earliest Home Brew

It is not a surprise, then, that the people who made the beer in this culture were the women. At home the women would have often brewed the beer as it may have been considered a task akin to cooking daily meals. Reasons for this might have been that beer was safer to drink than the water and it was also a source of calories and nutrients. They were not yet using hops to preserve their beer, so this home brewed beer would have been much lower in alcohol content. Therefore, it would not have been able to keep infections at bay for very long. So it would have been consumed very fresh, possibly as soon as the primary fermentation was complete. If the beer is only being made at two to three percent alcohol, it would only take a few days to completely ferment and would need to be consumed within a few days. It seems like it would not be unreasonable to say that they may have been brewing at home two or three times a week.

Glyphs

If you read my Grain to Glass post, you’ll have a good idea how beer makes into your glass. The process used in ancient Egypt, however, has been hotly debated. In the last thirty years, the argument has been distilled down into what we can actually discern from the information that’s left to us. The debate stems from a long artistic interpretation tradition of beer scholars. Scholars took art on the walls of the pyramids and used it to discern ingredients, processes, and other elements of the beer culture in ancient Egypt. These interpretations have led to some misconceptions, but it is now generally agreed that the beer was actually made from bread that had lots of yeast added to it. It was lightly baked and then stomped to break it up much like wine grapes. It would have been put into a large vessel for fermentation, then strained and put into a jar to be sealed for storage or transportation.

Big Business

Wait a second, I just said that these beer would have been made every few days and drunk very quickly. But just like we have big breweries today, there were big breweries back then. Egyptian beer was produced at such high volumes that breweries were able to supply all the local demand as well as leave some left over for export. The most popular beer from Egypt would have been from a city called Pelusium. It was so popular, in fact, in later times it was exported to Rome. Ian Hornesly writes in his book what this exported beer might have looked like.

“The possibility exists that we are looking at an ancient equivalent or our much-exported “India Pale Ale” from the ninetieth century. Beer destined for export must have had some “keeping quality to them, maybe via a herbal addition. Maybe IPA actually signified ‘Imperial Pelusian Ale’ ”

This just goes to show that nothing is new under the sun. If a beer has to travel, it  will need to to last longer. The only way to achieve that is to increase the alcohol content and add a preservative. Maybe a history of IPA will serve us well in the near future. Something else that is not new is that people of all walks of life and time like variety. Egypt was also a big importer of beer. The most popular beer they imported was from an area called Qode from somewhere near Babylonia. This beer is important because it seems to be the first beer that was produced outside of its original region. Hornsely asks if it is the first instance of brewing under license, meaning that the demand was too big for the main brewery to handle so itlicensed the recipe out to other breweries to make up for its shortfall. However, I wonder if this is actually the start of the Anhiseir-Busch beer corporation lineage…

Making a Living

With all of this beer being brewed in Egypt and imported from abroad, you might wonder what it is that they did with it. Or maybe you don’t, drinking it seems like a fairly obvious answer, but that is only part of the story. Beer and bread were actually a means of payment for working certain jobs. One person might be paid four khar (ancient Egyptian unit of measurement) of emmer (a type of wheat) and 1.5 khar of barley per month. This works out to roughly 202 kilograms or 444 pounds of grain per month. The person being paid does not receive this as raw grain, but rather receives it in its processed form of beer and bread. To put this into some perspective, it takes around 10 pounds of grain to make five gallons of 4%-ABV beer. So, 444 pounds of grain will make you 44.4 five-gallon batches of beer. Each five gallon batch of beer yields around 55 bottles, so in the end you end up with 2,420 bottles of beer per month, or 80 per day. There are, however, a great number of caveats to these calculations, not all of which I will be able to discuss here. I’ll mention a couple, though, the first one being that one person’s wage would probably be feeding a whole household. It would also be fair to say that a given household might want some bread during a given month, which would cut down drastically on the amount of beer it would get, especially with a larger family. So after these, and still other, allowances have been made, it’s probably fair to say that a worker would earn about a six pack of beer per day. Not too bad if you ask me.

And finally I’ll end with a list of names that the Ancient Egyptians would have called the varying styles of beers.

Dark beer, Sweet Beer, Thick Beer, Iron Beer, Garnished Beer, Friend’s Beer. Beer of the Protector, Beer of Truth, Beer Which Does Not Sour, and Beer of Eternity. I personally want to try the Friend’s Beer and the Beer of Truth, which was drunk by the 12 gods who protected the Shrine of Osiris.

There’s much I have sadly had to leave out, but I’ll have another swing at the ancient Egyptian beer culture one day. Until that day, I’ll leave you with the main resource I used so you can go dig in for yourself if you’d like. The book is called The History of Beer and Brewing by Ian S. Hornsey, Published by the Royal Society of Chemistry in Cambridge, England.

Style of the Week: Wheat Beer/ Hefeweizen


Most of the beer, if not all, made in Egypt would have had emmer wheat in it. So if you can find an emmerwheat beer, try that. If not, then go out and try a local offering of a wheat beer! Tasting notes can be found here.


As always thanks for hangin’.
Andrew

Andrew Colman – The Puzzle Box: Real Traditional Brown Section

Welcome to the Puzzle Box, everyone!

It has been an awesome Christmas season! Lots of family and food and beer. I’m lucky that my brother was the one to introduce me to Magic. I bring my cube and  we always fire couple of quick drafts after everyone has tired of each other. There was lots of watching the holiday cube while eating  Oma’s short bread and drinking some lambswool. Hope you had as much fun as I did!

We are coming to the end of our Puzzle Box building—we’ve got colorless this week and multicolored next week. I have seen a bunch of cool ideas from people on Twitter and in the comments section here on Brainstorm Brewery suggesting ways to continue with this series while sticking to the budget-yet-powerful theme. I had grand ideas of doing a “Pack to Puzzle Box” a la FMN Hero. But realistically, I’ve got school coming up again, then I’ll be heading to Europe for six weeks. From there I’ll be flying back and landing in Toronto, where I’ll engage in a three-year master’s degree at Trinity College at the University of Toronto.  All of this is to say that I don’t think I’ll have enough time to dedicate to getting out on a regular-enough basis to make that project worth while. Maybe after I’ve settled into a routine in Toronto and found a good  MTG scene I’ll engage in the “Pack to Puzzle Box Mission.” Or if I hear enough screams from the crowd maybe I’ll give it a shot. Lucky for me, chances of that are slim.

I’ll put it out again, if anyone out there knows where the good MTG scene in Toronto is,  please let me know.

Puzzle Box Artifact Section Ho!

I’ll start by saying it’s a good thing that we had some extra money from the red section left over. There was no way that this section could be $25. First of all, we’ve got more cards than the WUBRG sections and artifacts are inherently more expensive because they go in every deck everywhere ever.

The size of this cube is going to be really exciting for many reasons, but the colorless section is one that I am particularly looking forward to playing. Because we don’t have lots of the really broken stuff like the Mirrodin swords, Umezawa’s Friendship Ruiner ([card]Umezawa’s Jitte[/card]), or [card] Batterskull[/card], it means that underrated artifacts like [card]Zuran Orb[/card] , [card]Ankh of Mishra[/card], and [card]Mortar Pod[/card] will not be snap excluded from the a slot in a deck by the Jitte and will get some more regular play.

Luckily for us, there are some artifacts that are indeed very broken that do get to be included because of their banned status in most sanctioned formats. We get to include a card that could arguably be included in an extended list of the powered cards of Magic, the mentioned-in-previous-installments [card]Skullclamp[/card]. Also, [card]Tangle Wire[/card] is another of those absolutely backbreaking cards that we get to add to this list. If you have never resolved a [card]Tangle Wire[/card], let me take you through it.  You play it for three mana with four counters on it. You pass the turn and at the beginning of your opponents upkeep they have to tap four permanents. Your opponent probably does nothing and passes the turn, and at the beginning of your upkeep you remove a counter and tap three permanents, one of which is [card]Tangle Wire[/card], so only two pertinent cards. You pass and your opponent taps three permanents for a total of seven so far. You remove a counter and tap [card]Tangle Wire[/card] and one other permanent for a total of three relevant ones. On your opponent’s upkeep, he taps two more bringing his total to nine. On your turn remove a counter, tap only [card]Tangle Wire[/card], and go on with life. They tap their last permanent bringing the total number of permanents they had to tap to ten while you only tapped three.

[card]Bonehoard[/card] was an artifact that was tested out in many cubes when it was spoiled, but unfortunately, it ended up not being good enough for the very high-power cubes. Fortunately for us, our environment is not as powered and I think [card]Bonehoard[/card] will benefit from that. It should be made better by another fringy inclusion in [card]Mortar Pod[/card]. [card]Mogg Fanatic[/card] and its black version, [card]Fume Spitter[/card], are amazing cards and [card]Mortar Pod[/card] turns all of your outclassed creatures into a Mogg Fanatic. Green deck with lots of mana dorks that have outlasted their usefulness will turn into an extra few damage or spot removal for any X/1 creatures.

One of the concerns that I had at first was the [card]Tinker[/card] target count—I was one short of what I felt was optimal. With only two, [card]Sundering Titan[/card] and [card]Myr Battlesphere[/card], I did some digging and found [card]Steel Hellkite[/card]. A 5/5 flyer with with a conditional [card]Engineered Explosives[/card] is certainly no [card]Blightsteel Colossus[/card], but If you curve into it on turn three with a [card]Tinker[/card], you should be able to wipe most of their board the next turn and lock them out of the game. Of course, if you have a [card]Wurmcoil Engine[/card] or Colossus feel free to swap it out.


[deck title= Colorless List According to Type]
[Mana Artifacts]
Everflowing Chalice
Coldsteel Heart
Mind Stone
Darksteel Ingot
Worn Powerstone
[/Mana Artifacts]

[Equipment]
Bonesplitter
Trusty Machete
Skullclamp
Mortarpod
Grafted Wargear
Loxodon Warhammer
Bonehoard
[/Equipment]

[Utility Artifacts]
Zuran Orb
Black Vise
Pithing Needle
Ankh of Mishra
Ratchet Bomb
Crystal Ball
Mimic Vat
Tangle Wire
Icy Manipulator
Nevinyrral’s Disk
[/Utility Artifacts]

[Creatures]
Squee, Goblin Nabob
Perilous Myr
Phyrexian Revoker
Lodestone Golem
Masticore
Molten-Tail Masticore
Solemn Simulacrum
Precursor Golem
Steel Hellkite
Triskelion
Myr Battlesphere
Sundering Titan
[/Creatures]

[Land]
City of Brass
Evolving Wilds
Terramorphic Expanse
Grand Coliseum
Mishra’s Factory
[/Land]

[Other]
Noxious Revival
[/Other]
[/deck]

[deck title= List According to Cost]
[$3+]
Nevinyrral’s Disk
City of Brass
[/$3+]

[$2-$2.99]
Solemn Simulacrum
Skullclamp
[/$2-$2.99]

[$1-$1.99]
Grand Coliseum
Mishra’s Factory
Tangle Wire
Mimic Vat
[/$1-$1.99]

[$.50-$.99]
Pithing Needle
Masticore
Sundering Titan
Grafted Wargear
Coldsteel Heart
Squee, Goblin Nabob
Ratchet Bomb
Phyrexian Revoker
Warn Powerstone
[/.50-$.99]

[$.25-$.49]
Lodestone Golem
Ankh of Mishra
Molten-Tail Masticore
Everflowing Chalice
Myr Battlesphere
Steel Hellkite
Noxious Revival
Loxodon Warhammer
[/.25-$.49]

[$.01-$.24]
Icy Manipulator
Bonehoard
Triskelion
Black Vise
Zuran Orb
Crystal Ball
Mortarpod
Perilous Myr
Precursor Golem
Mind Stone
Evolving Wilds
Darksteel Ingot
Terramorphic Expanse
Trusty Machete
Bonesplitter
[/.01-$.24]
[/deck]


A couple of colored inclusions that you’ll notice in this list are [card]Squee, Goblin Nabob[/card] and [card]Noxious Revival[/card]. Squee just does a great many colorless things. One of my favorites is pitching him to [card]Fauna Shaman[/card] or [card]Masticore[/card] forever and ever. He’s one of the best [card]Skullclamp[/card] or [card]Mortarpod[/card] targets. If you use your imagination, Squee will be on your side! As for [card]Noxious Revival[/card], [card]Regrowth[/card] is good, and the fact that this only goes on top of you library is negated by the fact that it is free and instant speed. When you get miracles in your cube, they get way better in your opening hand when you have [card]Noxious Revival[/card] in your deck. And if need be, you can blank your opponent’s draw step by putting something useless from his graveyard on top of his library as well.


Remember, shoot me some more ideas on what you’d like to see in this column going forward, either here or on Twitter @awcolman, and I’ll do my best to oblige.

As always, thanks for hangin’.

Andrew