
Pauper? What does poverty have to do with Magic?
If you’re new to Magic, you might not know what Pauper is. Those who know of Pauper are asking, “Why are you writing about Pauper? Isn’t that format dead?” Well, Wizards of the Coast (WOTC) no long supports MTGO Daily Events for Pauper (editor’s note: This was recently changed) but I still support the format and will continue to use Pauper as a teaching tool for new players. Also, Cube is not dead. It’s actually thriving, so why not show some Pauper love?
So, back to those who haven’t heard of Pauper Cube. First off, a Cube, in MTG terms, is a draft format created by players like you. You basically have the power to become your own designer and developer for your own Magic set. Adjust the theme or power level of your cube as you see fit and, after some testing, all you’ll need to get your MTG fix is a group of people. For my parameters, I chose to only use cards that have been printed at the common rarity at least once.
- Example #1: [card]Oblivion Ring[/card] was first printed in Lorwyn as a common. All printings of Oblivion Ring after Lorwyn were printed at uncommon, but since it had at least one common printing, it is legal in Pauper.
- Example #2: [card]Abzan Charm[/card] is an uncommon from Khans of Tarkir and has no other prior printing. Therefore, it is not legal in Pauper.
Before we jump into the archetypes of my Pauper Cube, you might want the cube list as a reference.
Ginger Ale’s Pauper Cube
Archetypes
These six drafting strategies are not the only archetypes worth drafting. I’ve drafted my share of frankenstein decks and had success. These are just some straightforward archetypes that have enough cube support to survive when other players are in your colors. After you get used to the cube or your fellow drafters, I would actually encourage you to attempt something new or out of your element.
G/U Ramp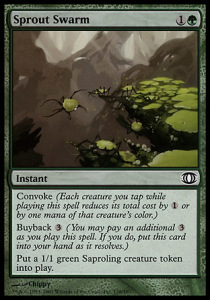

Priority #1: Ramp Spells ([card]Sakura-Tribe Elder[/card] & [card]Cultivate[/card])
Turns two to four are your ramp turns. Draft enough ramp so you can ramp two out on those three turns. Most of the fatties are five- and six-drops, so the sooner you get there, the better.
Priority #2: Bounce ([card]Mist Raven[/card] & [card]Man-O’-War[/card])
I prefer bounce over counter spells. Quite a few creatures in the cube bounce something when they come in. This allows you to advance your board presence for pressure and encourages your opponents to use removal spells before your fatties join the battle. Counters just don’t do enough for this strategy.
Priority #3: Fatties ([card]Nessian Asp[/card], [card]Horncaller’s Chant[/card], [card]Sprout Swarm[/card])
Trample should be your favorite fatty ability. Any creature with high toughness can’t kill your fatties in combat due to low power and most of the high-power creatures have one or two toughness. Trample is your friend and don’t you forget it. Also, most of the six- and seven-drop fatties will table. Value the four- and five-drop fatties higher, unless a bigger one has trample.
This is by far my favorite archetype. Even when I start a draft with intent to draft something else, someone passes me a [card]Mulldrifter[/card] or [card]Sprout Swarm[/card] and I just can’t resist.
 U/W Fliers

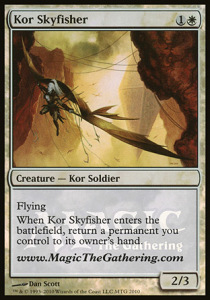
Priority #1 Fliers ([card]Kor Skyfisher[/card] & [card]Stormbound Geist[/card])
Ca-Caw! Fly your way to victory. Fliers that also tap blockers are worth keeping an eye out for. Not too many exist, though. You need an offense, so pick up strong fliers first.
Priority #2 “Arrest” Effects ( [card]Pacifism[/card], [card]Faith’s Fetters[/card], [card]Bonds of Faith[/card])
Though blue gives you access to bounce spells, many times the arrest effects are more of a permanent answer. An example when [card]Arrest[/card] effects are bad tend to show in the B/W builds since a large chunk of black removal in the cube makes them sacrifice a creature. Which one will they choose? Probably the one imitating the knot on a log. My point is, blue has to use a bounce spell, green and white may have sideboard cards to help with removing them, and both red and black have no efficient answers. [card]Sunlance[/card] should be the only removal you take over enchantment removal. Don’t pick up so many you outnumber your creatures but take them over bounce or counters.
Priority #3 – Counter/Cantrip ([card]Counterspell[/card] & [card]Memory Lapse[/card], [card]Ponder[/card] & [card]Preordain[/card])
Many times the counter spells will be in your sideboard for control matchups or decks with buyback spells. It’s great to have a few, but don’t take them over other playables. If you need to fill some holes, don’t see a creature worth taking, or don’t need a sixth Arrest effect, don’t hesitate picking up a few cantrips to keep the deck nice-n-smooth.
B/W Shadow Aggro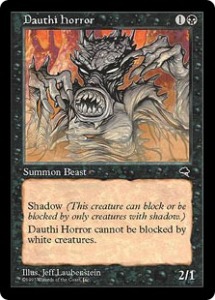

Priority #1 – Shadow Creatures ([card]Dauthi Horror[/card] & [card]Soltari Visionary[/card])
Makes sense, right? But what if I don’t see any shadow creatures (Only six in the cube) after I commit? Pick the most aggressive creature on color ([card]Carnophage[/card] and [card]Porcelain Legionnaire[/card] are good examples). Many times when drafting this archetype you’ll either get all the shadow creatures or none of them. Thankfully, many cheap B/W creature have a similar type of evasiveness ([card]Tormented Soul[/card], [card]Blind Zealot[/card], and [card]Benalish Cavalry[/card]), hence the archetype name.
Priority #2 – Pump/Equipment ([card]Sinister Strength[/card] & [card]Bonesplitter[/card])
Instead of relying on card draw or resilient creatures to push through the damage, consider permanently pumping up the creatures you already have. Drawing cards wastes precious time and resilient creatures often cost more than you are willing to pay besides [card]Loyal Cathar[/card] or [card]Doomed Traveler[/card] (thanks Innistrad block!). Also, a turn-one one-drop into turn-two [card]Sinister Strength[/card] is many times way better than playing another creature. Turn three is a good place to lay down two more creatures. This demands a removal spell and gives your second and third creatures a chance to get in for one or more turns. If they don’t have removal on turn two, your percentage to win rapidly increases.
Priority #3 – Removal ([card]Disfigure[/card] & [card]Sunlance[/card])
For this strategy, you require far fewer removal spells than any other archetype. These are only to move the small creatures out of the way for the few creatures that don’t have evasion or to take out a problematic lifelinker. Stick to one-mana removal spells if possible. Every turn should involve a new creature or pumping an existing one. After that, your extra mana can unlock a removal spell for the turn.
 U/B Control
Before addressing the priority order, keep in mind priorities one through three have spell versions and creature versions. I’ll add an example of each version on those but the creature versions are almost always favored over the spell versions.
Priority #1 – Disruption ([card]Hymn to Tourach[/card], [card]Capsize[/card], [card]Liliana’s Specter[/card], [card]Aethersnipe[/card])
Putting pressure on your opponent’s hand size is a great way to attack in pauper. Aggro can’t recover and can only cast a portion of its spells. Ramp decks have to choose between ramp and a fatty when the deck requires both to work smoothly.
Priority #2 – Removal/Counters ([card]Evincar’s Justice[/card], [card]Crypt Rats[/card], [card]Shaper Parasite[/card])
After disruption, take care of leftover spells with counters for noncreature spells and removal for creatures. Draft more removal that other strategies, but I wouldn’t recommend going over three removal spells in the main deck. Creature counters are usually better than noncreature counters in the main deck. Noncreature counters should be sideboarded in for buyback spells.
Priority #3 – Draw/Cantrips ([card]Treasure Cruise[/card], [card]Mulldrifter[/card], [card]Phyrexian Rager[/card])
Cantrips smooth out your draws and help you make your land drops. Draw cards to stay ahead of your opponent’s cards. This lets you use the weakest removal spell to kill that problematic creature, or you can save the broader removal for bigger threats. Apply the same philosophy with your counter spells.
Priority #4 – Win Con ([card]Gray Merchant of Asphodel[/card], [card]Shimmering Glasskite[/card], or splash for [card]Guardian of the Guildpact[/card])
You should only need a couple of these. The amount of creature version cards you picked up in the draft will determine the amount of reliance you place on your win cons. The more damage you can safely get in before it’s time to release your finisher will determine the amount of pressure each of your win cons will have.
G/W Aggro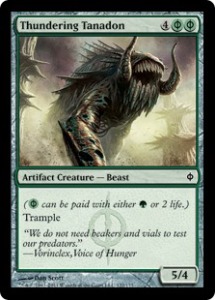

Priority #1 – Combat-Ready Creatures ([card]Loyal Cathar[/card], [card]Kor Skyfisher[/card], [card]Thundering Tanadon[/card])
Look for resilience, evasiveness, or both. This archetype relies on your creatures holding their own in the red zone. This strategy has a wide variety of builds but should always be open during the cube draft.
Priority #2 – Upgrade Spells ([card]Travel Preparations[/card], [card]Leafcrown Dryad[/card], [card]Shield of the Oversoul[/card])
These spells enable your weakest creatures to join the battle or keep your larger creatures from getting double blocked. I probably wouldn’t play more than four of these effects, unless they are also creatures like [card]Leafcrown Dryad[/card]. The more creatures you have, the more options you have for your upgrade spells.
Priority #3 – Support Creatures ([card]Gideon’s Lawkeeper[/card] & [card]Kabuto Moth[/card])
These types of creatures make combat a pain for your opponent. Lawkeeper helps support your attacking creatures and Kabuto Moths supports your creatures after blocks are declared or removal spells are on the stack. Support creatures help skilled players craft the winning battlefield and can play both offense and defense. A couple of these creatures can take your GW Aggro deck from good to great.
 Burn & Friends
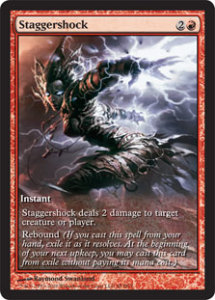
Priority #1 – The Burn ([card]Staggershock[/card], [card]Brimestone Volley[/card], [card]Fireball[/card])
This drafting strategy is different than all the others. Red needs a friend. So while you take the burn spells, keep your eyes peeled for an open second color.
Priority #2 – Choosing a Second Color
R/U Bounce Burn plays a tempo game with ways to rebuy your burn spells for extra value.
R/W Weenie Burn / Shadow Burn plays the same as the B/W Shadow Aggro deck, except most of the black removal is … well … removed, and replaced with burn spells that can scorch creatures or sunburn your opponent’s face.
R/B Dark Burn is the style i have had the most success with. The black enables disruption, drain effects, and card draw at the price of life points. This strategy can pressure the hand, battlefield, and face all at the same time. Black can also assist with better overall aggressive creatures versus the red alternatives. With this disruption, you could buy an extra three or four turns to draw that top-deck burn spell you’re waiting on.
Priority #3 – Balance
Balancing like the B/W Shadow deck with a slightly higher priority on taking burn spells over spot removal should set you up in a place where the red-based decks thrive in. Keep in mind your creatures are potential repetitive damage while your burn spells are only one-time use.
Wrap Up
Pauper will always have a special in my heart. It’s a budget friendly format that heavily punishes your misplays. Many times I’ve even said, “Wow, this format feels like Legacy.” It demands optimal plays and always surprises players after I convince them to give it a shot. When I say, “It’s a common-only format,” players never think long enough to remember the high number of powerful yet value-filled staples. All in all, the best advice I can give you is: don’t knock it ’til you try it.
If you enjoyed this Pauper content and want more, leave a comment below or hit me up on Twitter and tell me what you want to read about next.
As always, thanks for reading!
@TNSGingerAle
One comment on “Pauper Cube: Drafting Tips, Tricks, and Archetypes”
Leave a Reply to Cheap Ralph Lauren Polo Uk Kids Cancel reply
You must be logged in to post a comment.
Bath and Body Works usually try to stress the theme of the summer season. It is important consumers not necessarily fooled by knock-offs.
From them, you can have many different styles of glasses and the
professional skills and services of them can aid you find few eye
wears suits you should. It can be making beer, barbecue sauce, jewelry,
ceramics – whatever enjoy to get. Cheap Ralph Lauren Polo Uk Kids